 These blocks are pretty easy to make and are a really great handmade baby gift. I made one for my nephew as a late holiday present, and one to coordinate with this baby blanket. Now, I have a tutorial to share with you! Here's what you'll need:
Fabric: I used 4 fabric squares that are 4x4 and 2 chenille squares also 4X4. You need 6 squares in total, and they need to be square. What you use for fabric and the dimensions are really up to you. I used the same concept to make some pattern weights, tutorial here.
You'll also need:
- 4 pieces of ribbon about 2-3 inches each,
- some kind of stuffing (I used polyester Fiberfill),
- your sewing machine and thread
- a hand sewing needle and some thread
 Fold your ribbon in half, center and pin to one side of a fabric square.
 Lay another fabric square on top and sew down the side with 1/4 inch seam.
 Press seam open.
(you can also machine baste your ribbon in place first, as I did on the green square, below)
 Repeat with the remaining 2 squares and 2 pieces of ribbon until you've got 4 pieces in a row with 3 ribbons sewn in.
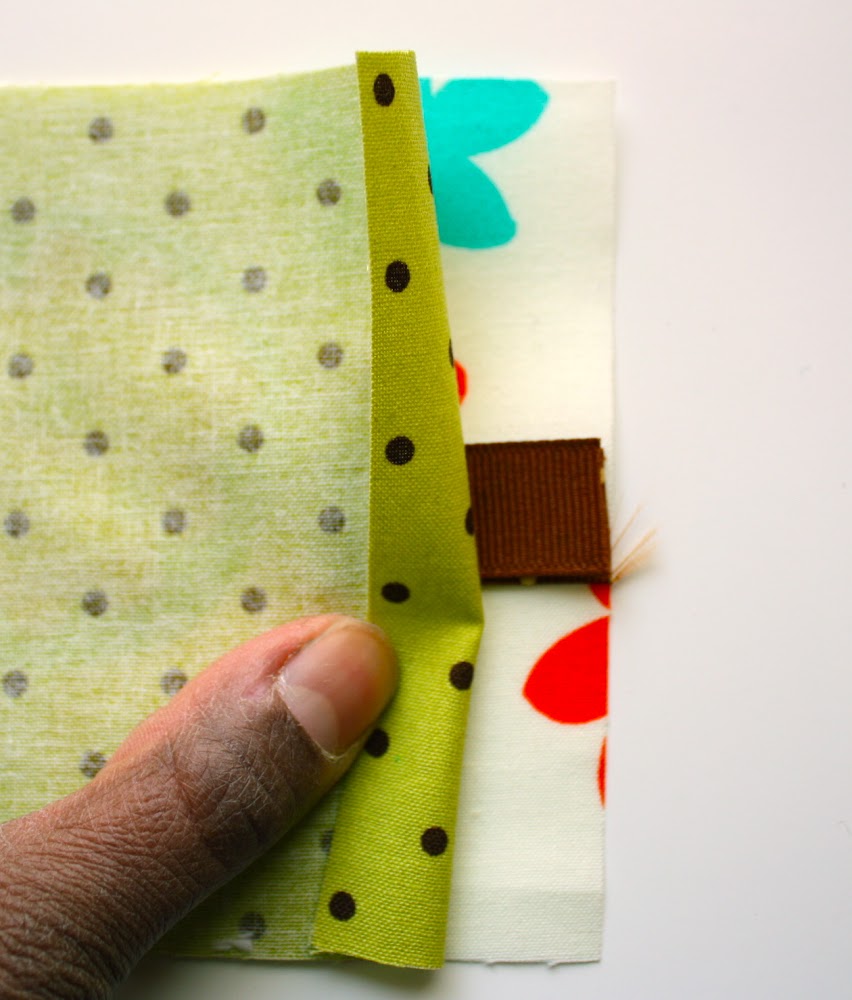
 On the first and last square, fold fabric over to the wrong side 1/4 inch and press. Attach the last piece of ribbon to one end of your fabric strip.
 With right sides together and 1/4 inch seam, sew the chenille squares to the square in position C.
  Now you need to start sewing sides together to form the block. It's a little hard to show this, but basically you will start by sewing side A to E and side D to E. It will look like this.
  Continue sewing each side to the chenille squares in the same way. Trust me, it will make much more sense when you're actually doing it. When you get to the last side, stop your seam at the 1/4 inch fold you made before.
  Here's what you'll have when you've sewn up all the sides, except the last side where you folded over 1/4 inch. You need to leave this side open for turning.
 Turn your block right side out....
 and fill.
 Pull the last 2 sides together, match where you folded the fabric, and pin. Use a needle and thread to blind stitch the side shut.
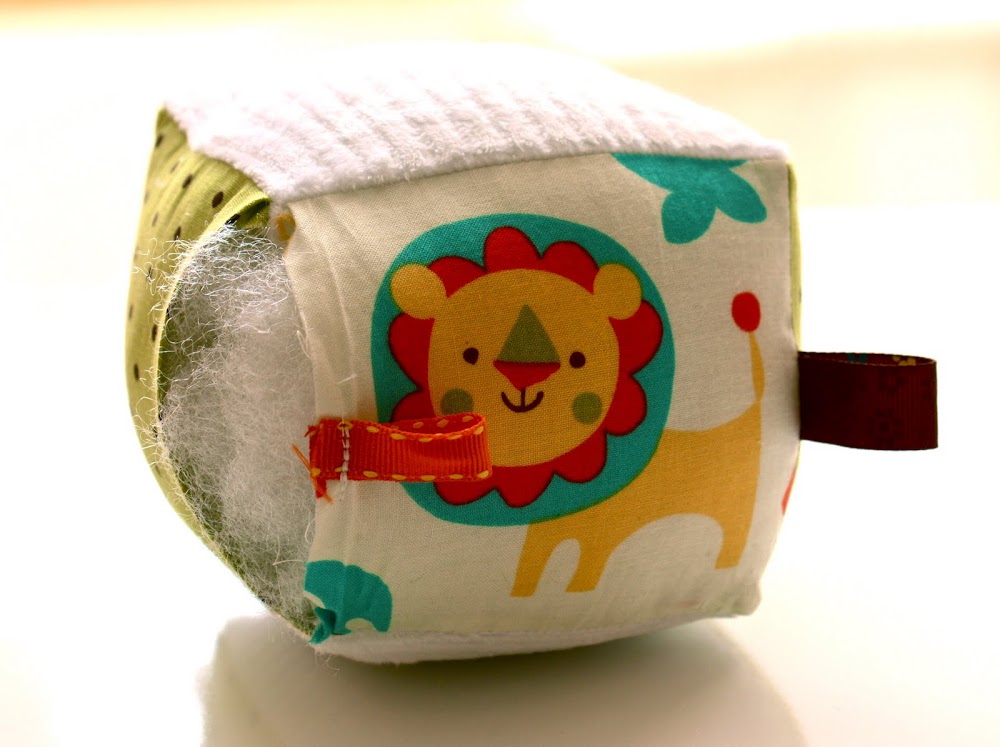
 So cute! I made this one to go along with a baby blanket I made for a friend which I posted here.
 Have fun! Leave me a comment and a link if you make one. I'd love to see!
 A Friday ritual. A single photo - no words - capturing a moment from the week. A simple, special, extraordinary moment. A moment I want to pause, savor and remember.
inspired by SouleMama
My dear friend Roselee, aka Jane of All Trades, made me this baby blanket almost 3 years ago (yikes!) when I was pregnant with my son. This was one of those gifts that for whatever reason, aside from it being so beautiful and amazing, I absolutely treasure. I think in part, it's because at the time I was finding it so difficult to find cute stuff for my soon to be arriving boy.
 It's hard for me to believe this was that little baby boy..
 Since I have a special attachment to this blanket, I decided to make one for a good friend who is expecting a little boy soon. The original pattern is from Amy Karol's, Bend the Rules Sewing, which is a great book I would highly recommend. I lent my copy to my sister, so I decided to wing it.
I cut my fabric (for front and back) and batting to be 34" by 34". Then layered the fabric with right sides together on top of the batting, and pinned.
 I actually wanted to try to make the scallops a little bigger, so I used a cereal bowl, to draw the edge. If you try this, don't make the mistake I made (and often make). I used a permanent marker. There were a few spots where I went too far with the scallop and as a result, you can see the marker when the blanket is turned.
 Here's what makes this project so easy, you just sew on your lines (make sure to leave and opening for turning) and cut later! I love that! I used pinking shears to cut away the extra fabric and then went back and notched the indents. Even still, it puckered a little when I turned it.
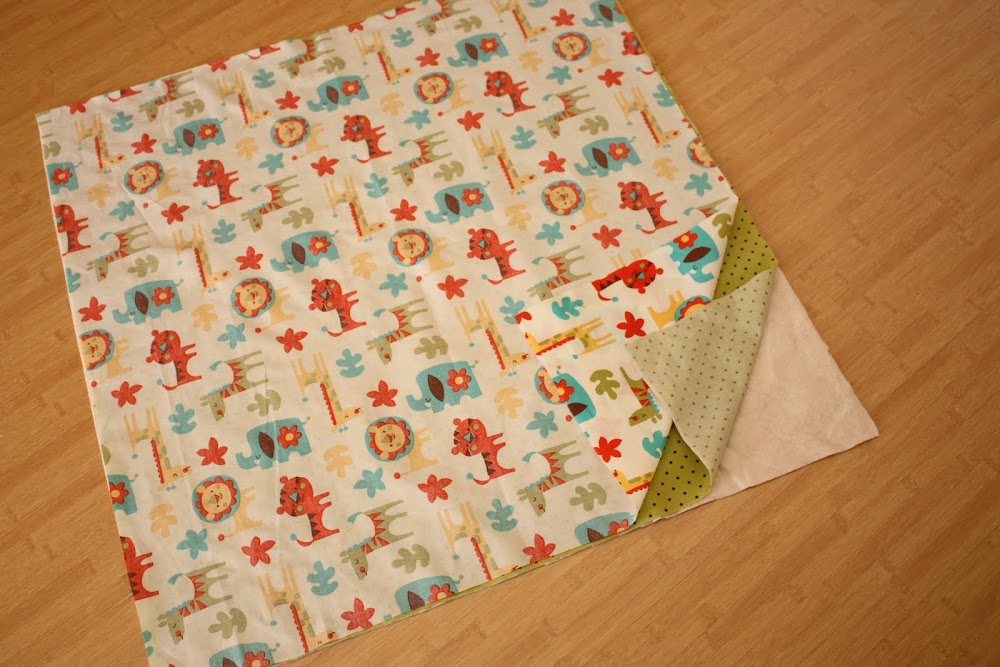
 Turned, top-stitched and quilted.

 I hope she treasures it as much I treasure mine....no pressure :)
 Just got back from a full morning of sledding and chili and I'm ready to show you part 2, the Diaper and Wipes Clutch. I've made 2 of these for myeslf (lost the first one) and find it to be so convenient to have my wipes and diapers in a little sleeve. It's easy to switch it from bag to bag or throw it in the car etc. Also makes a great alternative to a diaper bag for daddies. Here's what you need:
Diaper Sleeve
exterior fabric, 1 piece 7" x 22" and 2 pieces 7" x 4" for the flap
interior fabric, 1 piece 7" x 22"
8 inches of elastic
1 snap fastener
midweight fusibible interfacing 7" x 22" and 7" x 4" (optional)
I like my sleeve to have a bit of a sturdy feel, so I fuse a mid-weight interfacing to the exterior fabric and flap. This is totally optional, but I would recommend it if you are using a lightweight fabric.
So, take your flap pieces, wrong sides together, and using a jar lid or CD, round both corner corners.
 Then, with 1/4" seam allowance and right sides together, sew around the rounded outer edge
.
Trim the seam allowance with pinking shears or clip into the curves.
 Turn, press and topstitch.
 Take your exterior piece and fold in half matching shorter sides. The fold will be the bottom of your pouch. If you want to add some applique or embroidery, this is the time to do it. I added a little brown bird to mine.
 On the back side of the sleeve, center the elastic, about 5 inches up from the folded edge. Machine baste in on sides.
 Now, unfold and fold again so that the right sides are facing and sew 1/4" seam along both long sides. Do the same for the lining fabric.
 Trim the corners and extra elastic, and turn the exterior pouch right side out. Pin the flap to the back of the pouch, matching the raw edges, and machine baste in place.
 Slide the exterior pouch inside the interior pouch, with right sides together and pin along the top.
  With a 1/2 inch seam allowance, sew around the top, leaving an opening for turning.
 Turn and press. Pin the opening closed, and top-stitch making sure to sew the opening closed.
 Add a snap, fill with diapers and you're ready to go.
Don't forget to fold up your changing pad and slip it into the elastic on the back.
 Now go change some diapers in style!

 These blocks are pretty easy to make and are a really great handmade baby gift. I made one for my nephew as a late holiday present, and one to coordinate with this baby blanket. Now, I have a tutorial to share with you! Here's what you'll need:
 Fold your ribbon in half, center and pin to one side of a fabric square.
 Lay another fabric square on top and sew down the side with 1/4 inch seam.
 Press seam open.
 Repeat with the remaining 2 squares and 2 pieces of ribbon until you've got 4 pieces in a row with 3 ribbons sewn in.
 On the first and last square, fold fabric over to the wrong side 1/4 inch and press. Attach the last piece of ribbon to one end of your fabric strip.
 With right sides together and 1/4 inch seam, sew the chenille squares to the square in position C.
  Now you need to start sewing sides together to form the block. It's a little hard to show this, but basically you will start by sewing side A to E and side D to E. It will look like this.
  Continue sewing each side to the chenille squares in the same way. Trust me, it will make much more sense when you're actually doing it. When you get to the last side, stop your seam at the 1/4 inch fold you made before.
  Here's what you'll have when you've sewn up all the sides, except the last side where you folded over 1/4 inch. You need to leave this side open for turning.
 Turn your block right side out....
 and fill.
 Pull the last 2 sides together, match where you folded the fabric, and pin. Use a needle and thread to blind stitch the side shut.
 So cute! I made this one to go along with a baby blanket I made for a friend which I posted here.
 Have fun! Leave me a comment and a link if you make one. I'd love to see!


