7.24.2013

Gardening in a Small Yard

Last week I promised to share an updated Girls Swimsuit pattern, and somehow, the time has gotten away from me.  The pattern is set and ready to go, I just need to take a few more pictures.  So tonight I sat down to do just that, only to find, I'm out of lining fabric.  So, the swimsuit post will have to wait.  In the meantime, I thought I would share some photos from our garden and talk about gardening in a small yard.

We love our house and neighborhood.  The only downfall is that we have a very small yard.  There's a steep drop-off in the back which is fun because our upstairs windows are almost at tree level, but doesn't give us much room for a large garden.  In years past we've signed up for a CSA share at a local farm.  But this year, we decided to see if we could make it work in our yard.  And, we've finally had some success.
In the Spring, my husband built a few raised beds and we had a local farm deliver some loam and compost.  Some plants we bought and some we grew from seed.  We set aside some space to let the kids plant for themselves. They've really enjoyed watching, taking care of, and eating from their very own garden.

It's amazing how much you can fit in a small space.  We've got 5 broccoli plants that somehow have survived the bunnies and woodchucks.
 A few different kinds of peppers.
 Probably about 5 cherry tomato plants because my kids could eat tomatoes for every meal. 

 3 eggplant plants that are so beautiful.
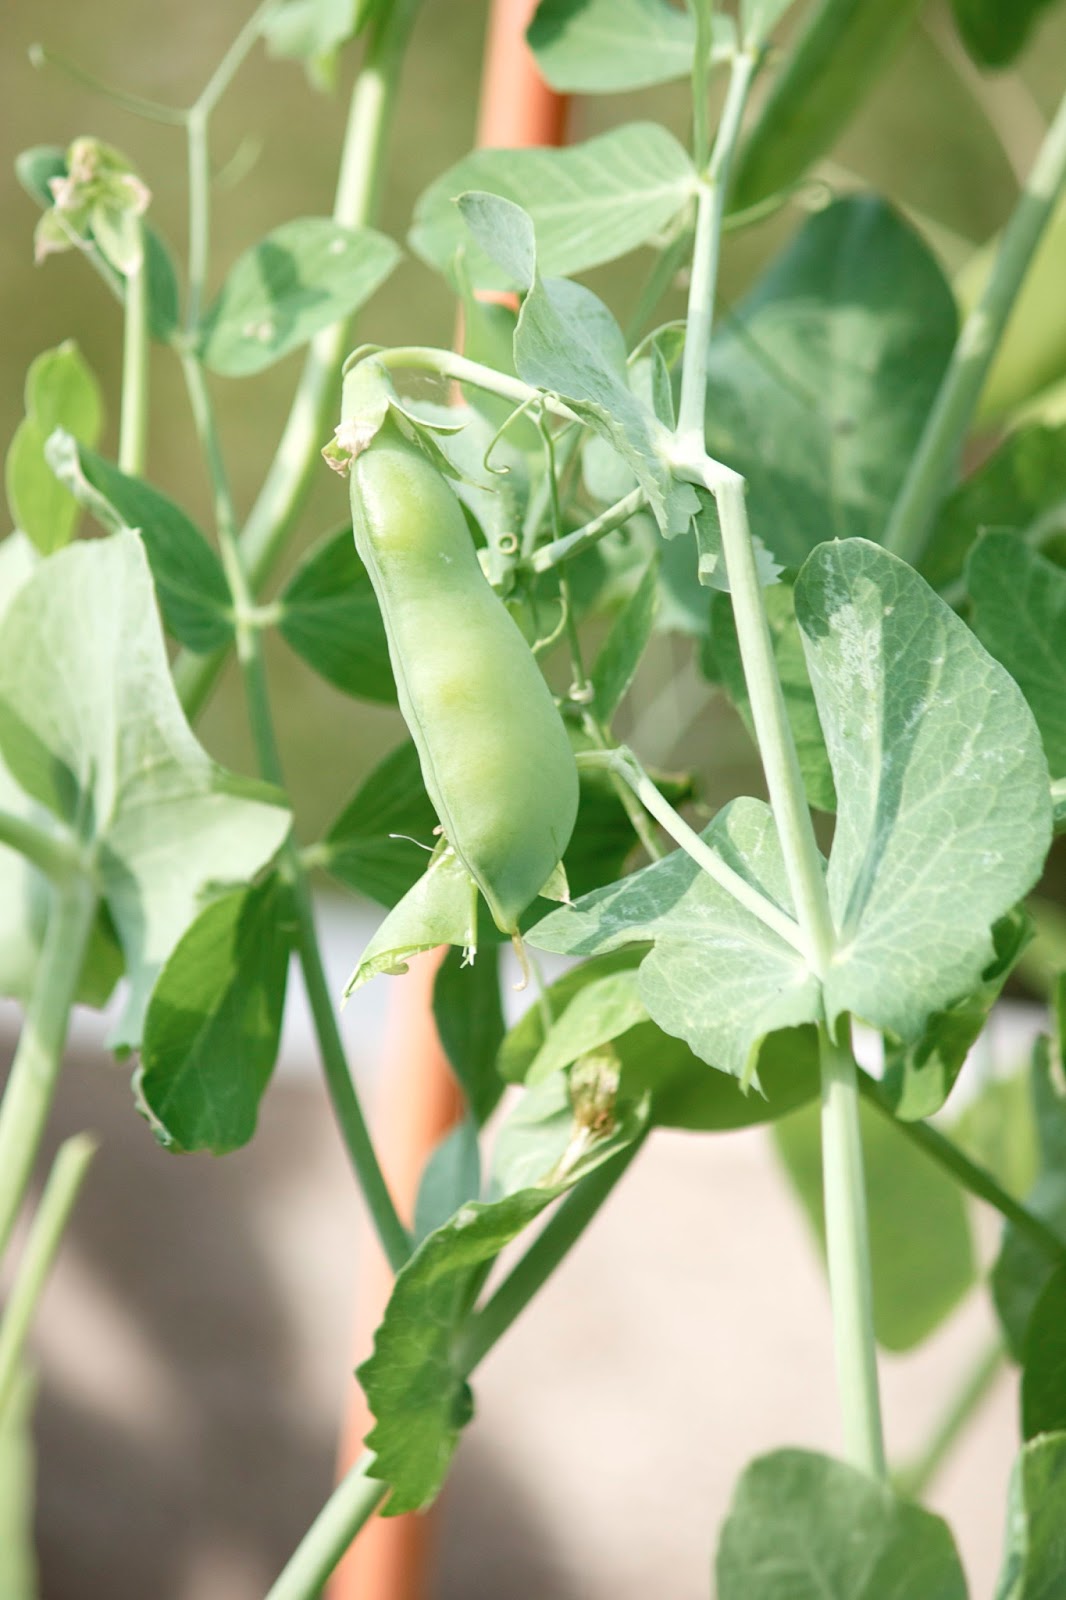
 A few sugar snap pea plants that though they didn't get as big as we were hoping, still have been producing a decent amount.  We also put in a bunch of lettuce, carrots, beets, and a ton of basil.  I see quite a bit of pesto in my future!

I think the key to gardening in a small yard is to work the garden into the landscape.  We have 2 small apple trees along the edge of our yard that help to provide a natural border.
We also have a large patch of red raspberry bushes that work as a natural fence.  Once these start to ripen, we almost can't keep up with the picking.
 Some wild black raspberries creeping in from the surrounding woods.
 A few years ago, we added the garage on to our house and were left with a large exposed concrete foundation.  We decided to plant grapes and kiwi-berry vines to hide the concrete.  And in just a few years, we've got an amazing amount of fruit waiting to ripen.

As I'm write this post, the funny thing I'm realizing is that though we grow a lot in our yard, very little actually makes it in the house.  The tomatoes, raspberries, and grapes get eaten in between bike rides and swinging, right off the plant. Nothing like a warm, sun-ripened tomato right off the vine.

Thanks for staying with me as I ramble on about my garden.  I promise to be back soon with the promised swimsuit pattern.

7.13.2013

Sewing School 2 - Book GIVEAWAY at Jane of All Trades

 
Roselee over at Jane of All Trades has an awesome giveaway going on right now.
 

She and her daughter E review the new book, Sewing School 2: Lessons in Machine Sewing. And, they are giving away a copy.


Being the generous lady she is, she's also giving away a pack of these cool pens, to 2 lucky entrants.  And how timely given that I recently confessed my secret habit of using permanent marker on fabric.  These pens erase with friction or heat.

So to recap, 3 lucky winners, 1 amazing book, very cool pens.

Go HERE to enter now! 

Giveaway ends July 16, at midnight Eastern time and is open to US residents only.

7.12.2013

Guest Posting at Make It Handmade


Today I'm guest posting over at Make It Handmade as part of Palak's Handmade Confessions Series


Go check out what I have to confess....

And don't miss Palak's great serger tutorials.  It's one of the best serger resources I've found.

Have a great weekend and be sure to check back next week when I hope to share an updated pattern for my Girls Swimsuit Tutorial.

7.08.2013

Backpacks Are BACK....

 and they're better than before!

Last year, I sized up the Made by Rae Toddler Backpack for my kindergartener.  And now, for a limited time, I have a few for sale in my etsy shop.

Here are a few of the features of this enlarged and improved backpack.
Backpacks are fully lined with a medium weight cotton canvas and all seams are serged for extra durability.
 Each backpack has a 14 inch, heavyweight, sport zipper which is more durable and also a little easier to zip.

 These packs are 13.5 inches tall, 11.5 inches wide, and 4.25 inches deep.  The size fits a folder, lunch box, and snack pack perfectly.
 
Here the backpacks are shown on an almost 7 year old and almost 5 year old.  I wanted the backpack to be big enough to hold the essentials, but also small enough to be manageable on the bus and at school.

So get them while they last!

6.26.2013

Dress Pockets - TUTORIAL & PATTERN

 
 I've been making dresses like a crazy lady lately.  Using my Jersey Dress Tutorial as a starting point, I've made a couple different versions and finally tackled pockets!  It's actually easier than it looks. 

 First, download pocket pattern HERE 
(this pattern works great for me, you may need to alter to fit your hands or skirt)

Cut 4 pocket pieces total, 2 sets of 2 on folded fabric so they are mirror images of each other.

 
Lay your skirt front out in front of you.

 With right sides together, lay 1 pocket piece on each side of the skirt, making sure the top and sides lines up. Pin in place and fold the skirt in half so that you cut both pockets evenly.  Draw a nice curve and cut through all 4 layers of fabric.
 When you open up the skirt, it should look about like this.
 Sew along the curved edge.
 Turn pocket to the wrong side and press well.
 Here's what it looks like on the wrong side of the skirt front.

 Lay the corresponding pocket piece on top of the sewn pocket, right sides together.  Pin through just the pocket layers.  Sew from the top to the side.
 That's pretty much it!  You can top stitch the pocket edge if you like.  Finish your skirt or dress and enjoy your new pockets!


6.23.2013

Dress Obsessed and a Tutorial Preview

I've been totally dress obsessed here lately and somehow, I just found out about the Summer of No Pants sewalong.  I didn't officially join, but all this time, I've been playing along and didn't know it.
Summer for me is all about skirts and dresses.
 While working out all the details of my Jersey Dress tutorial, I really came to understand basic, and I mean basic, knit dress construction.  I didn't realize it could be so easy.  I've made a few for the girl.

And a matching one for myself.  As an aside, she actually wanted me and her to wear our matching dresses when I volunteered for field day at her school.  How long do you think that will last?
 A fun black and white chevron version.
 Mustard stripes with a cool back cutout.
 I'm not gonna lie, there are a few more that I didn't have time to photograph.  It's really fun.  Once you've got the basic pattern, you can pretty much cut and finish a dress in 3 hours or less.
 And just this weekend, I figured out, POCKETS!  I think my life may be complete.  Dresses with pockets!

Tutorial coming soon.  

If you haven't checked out my Jersey Dress Tutorial, go do it now.  Then you'll be ready and can make yours with pockets too!

6.15.2013

Teacher Gift: FREE PRINTABLE

 
10 months ago, we sent our oldest child off to kindergarten.  Our tentative, quiet, little girl cried every morning for the first week.  It was a tough week.
And what feels like a short 10 months later, she's blossomed into an outgoing, curious, little chatterbox who rushes to get dressed and teeth brushed at the mere mention of missing the bus.

 It's been an amazing year and I'm so thankful for the great school and teachers we have.
So I put together some little gifts to say thank you.

I found these cute metal tins at the Dollar Store and used a  hammer and nail to poke holes in the bottom.  We bought a 6 pack of thyme and a 6 pack of oregano at our local Farmer's Market and put one of each into each tin.  
Oregano is a great container plant since it self seeds and can take over a yard in no time flat.  Better in a container than in your lawn!
 
I used paper, punches, and sticks that I had around the house to make the labels.  

Free printable HERE.

The least I could do to thank our teachers for helping my little girl grow.