2.24.2014

2, 4, 6, 8, who likes to PROCRASTINATE...

 This past week the kids have been off from school for February break.  We did a lot of fun family activities which meant not a lot of sewing got done.  So when Saturday rolled around and I finally got a little time, did I work on the unfinished projects that NEEDED to get done?  Nope, I totally procrastinated and decided to make a new ironing board cover instead.
The old cover had pretty much disintegrated and I was planning on buying a new one.  But, in an effort to use up fabric from the stash, I decided to make one.  I couldn't find a great tutorial to follow, so I just cut the elastic off the old one, traced my new fabric a little larger and made a casing.  I was being kind of cheap about it and decided to use a sturdy string to pull the casing tight rather than elastic.  It didn't work the best.
 I was able to reuse the hook and loop fasteners on the bottom, which helped.  While I was in the procrastination mood, I made a little tool organizer.

I attached it to the side with some adhesive hook and loop tape.
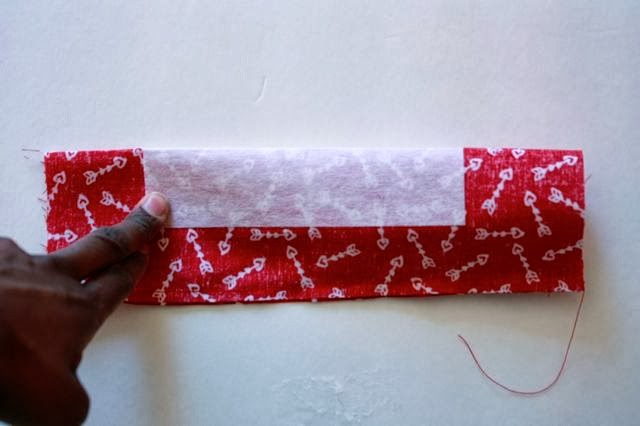
 A simple sleeve roll stuffed with fabric scraps.
 I also made a simple, weighted pin cushion.  I've dropped my plastic, magnetic pin cushion one too many times.  This one was super easy.  Just slipped a bean bag in the bottom and fiberfill stuffing in the top.
 Now that I've got a nice, neat, pressing station, I guess I can do some real work.

What do you do when you're procrastinating the projects you NEED to do?

2.13.2014

The Lane Raglan Zaaberry Style

A few weeks back, Adrianna of Crafterhours released her first pattern for women, The Lane Raglan.  I've been a huge Crafterhours fan for years and even got the opportunity to pattern test when The Greenpoint Cardigan pattern was in the making.  
So, when on the day of the pattern release Adrianna said that 100% of the proceeds that day would go to charity, I absolutely couldn't say no.  
This yellow version was the first one I made, and in typical fashion, I put my own twist on the pattern.
 I wanted a shirt that was a little more tunic-like and made an asymmetrical hem.  The fabric is a heavyish weight knit. It's super comfortable, but the fabric isn't my favorite.  You can't see it so well in the picture, but the face of the fabric is kind of fuzzy and not so great looking.
 I do like the way it looks from the back.  Guess I'll just have to walk around backwards.

My next Lane Raglan I did a pattern mix-up and used the Lane for the top of a Lady Skater.  If you're a frequent Zaaberry reader, you know how much I LOVE the Lady Skater Dress Pattern.
This version is nice, comfy, and very wearable.  I think I shortened the bodice a bit, and didn't use the elastic at the bottom.  The fabric is heavy enough that it didn't need it.  And though it does help stabilize the seam, I found that it's kind of pokey on the my other dresses.  So I was glad I didn't need it this time around.
I'm going to need to learn about a swayback adjustment.  The back puckers on all my dresses...
Any good tips?

2.10.2014

Easy Clip-On Bow Tie - TUTORIAL


What little boy doesn't look cuter with a bow tie?  Here's an easy tutorial for a bow tie that can clip on to any shirt.  My little guy loves bow ties, but rarely wears a shirt with a collar.  So a clip on is the way to go.
Easy enough to whip up for that special Valentine's Day outfit.

 Here's what you need:
fabric rectangles, 10 x 6 inches and 4 x 2.5 inches
midweight fusible interfacing, 6 x 2.5 inches
1 clip on earring clip (I got mine HERE)
glue gun and felt scraps to attach the clip
 Fuse the interfacing to the center of the wrong side of the large rectangle.
 Fold the rectangle in half and stitch along the long edge with a 1/4 inch seam allowance.
 Turn right side out and press so that the seam is in the center of one side (the interfacing will help the fabric settle this way)
 Match the short, raw edges, with the previous seam on the outside.
 Sew along the edge with a 1/2 inch seam allowance and pink or finish edge.
 Flip the loop so that the seams are now all on the inside and centered at the back.
 Fold in half lengthwise and sew a line of stitching about 2 inches long, about 3/4 of inch from the fold (white line in the photo below)
To make the center of the bow tie, take the smaller rectangle and fold in fourths; 
fold in half the long way, unfold, fold the long edges to the center, fold in half again.

 Top-stitch along each long edge.


 Determine how tight you want the center loop to be and sew.
 Trim edge.
 Flip so the raw edge is on the inside.

 Slide the loop around the bow.
 Glue the earring clip to the back of the bow tie.
 Glue a small felt square to cover the metal.
 Cut a long strip of felt and cover the entire clip.  I find that the felt is necessary to hold the clip to the shirt.  The metal slips off fairly easily.
Adorable!
I am not adorable.
Okay...maybe I am.


1.20.2014

Lisette Travelers Dress

 Just when it seemed like Spring was in the air, we got a few inches of snow and the temperatures for the coming week are going to be way below normal, again.  So though I was thinking of Spring when I started working on this dress, it will definitely be sitting in the closet for a while.

 Ultimately, I'm happy with my final dress, but I don't love this pattern.  My usual problem with sewing with wovens and commercial patterns is that the sizing is tough.  Knits are so much more forgiving and jive better with my type B sewist personality.  
In an attempt to follow the rules, I took my measurements and cut a size 12.  Now I'll tell you that when I buy clothes in the store, I'm usually just about the smallest size you can get.  So, cutting a 12 seemed odd, but that's what my measurements dictated.  Well, my first dress came out gigantic!  It felt like a lab coat, which is kind of fun since I work in a lab.  Maybe I'll add the buttons and feel extra fancy at work.
This dress was my inspiration and I was pretty bummed that my first dress didn't work out.  And, the fabric wasn't cheap.  I might have to try to re-cut it and....make it work!

 I went back to my pattern and this time cut a size 6.  This is definitely the size I need, though I'll tell you there's no way my waist is 23 inches!
Though the size 6 did end up being the right size, I still had to make some adjustments.  The armholes and the neck were so teeny tiny and I ended up making them bigger.  In retrospect, I should have also used a bigger sleeve, so the dress is a tiny bit tight in the armpit region.
The other changes I made were to eliminate the lower pockets, make flap pockets for the top (used THIS tutorial), and I added a little button tab to the sleeves.
So, to summarize:

PATTERN: Simplicity 2246
FABRIC: lightweight cotton chambray
SIZE: 6 
RESULT: I'm happy with the dress, 
but probably won't make it again.


1.16.2014

Sweater Knit Lady Skater

I'm finally getting around to sharing another dress made with my favorite pattern, the Lady Skater Dress.  This is my, wow, fifth dress from this pattern.  My others are here and here and here.
I wanted a comfy, sweatery (I made up a new word), warm, dress to wear in the winter.  This dress really fit the bill.  The fabric is a sweater knit from Joanns.  I made the skirt even less full than in my previous versions  and I'm happy with the result.  I had a little trouble in the back this time around.  It's a little looser than I intended, though I'm not sure why.  I still love it and wear it a lot. 
It's been a bit warmer here than is typical and is making me think about Spring.  So I started working on a new dress that's a little outside the box for me.  It's a commercial pattern and it's a woven!


 Hopefully I'll have dress to share soon!