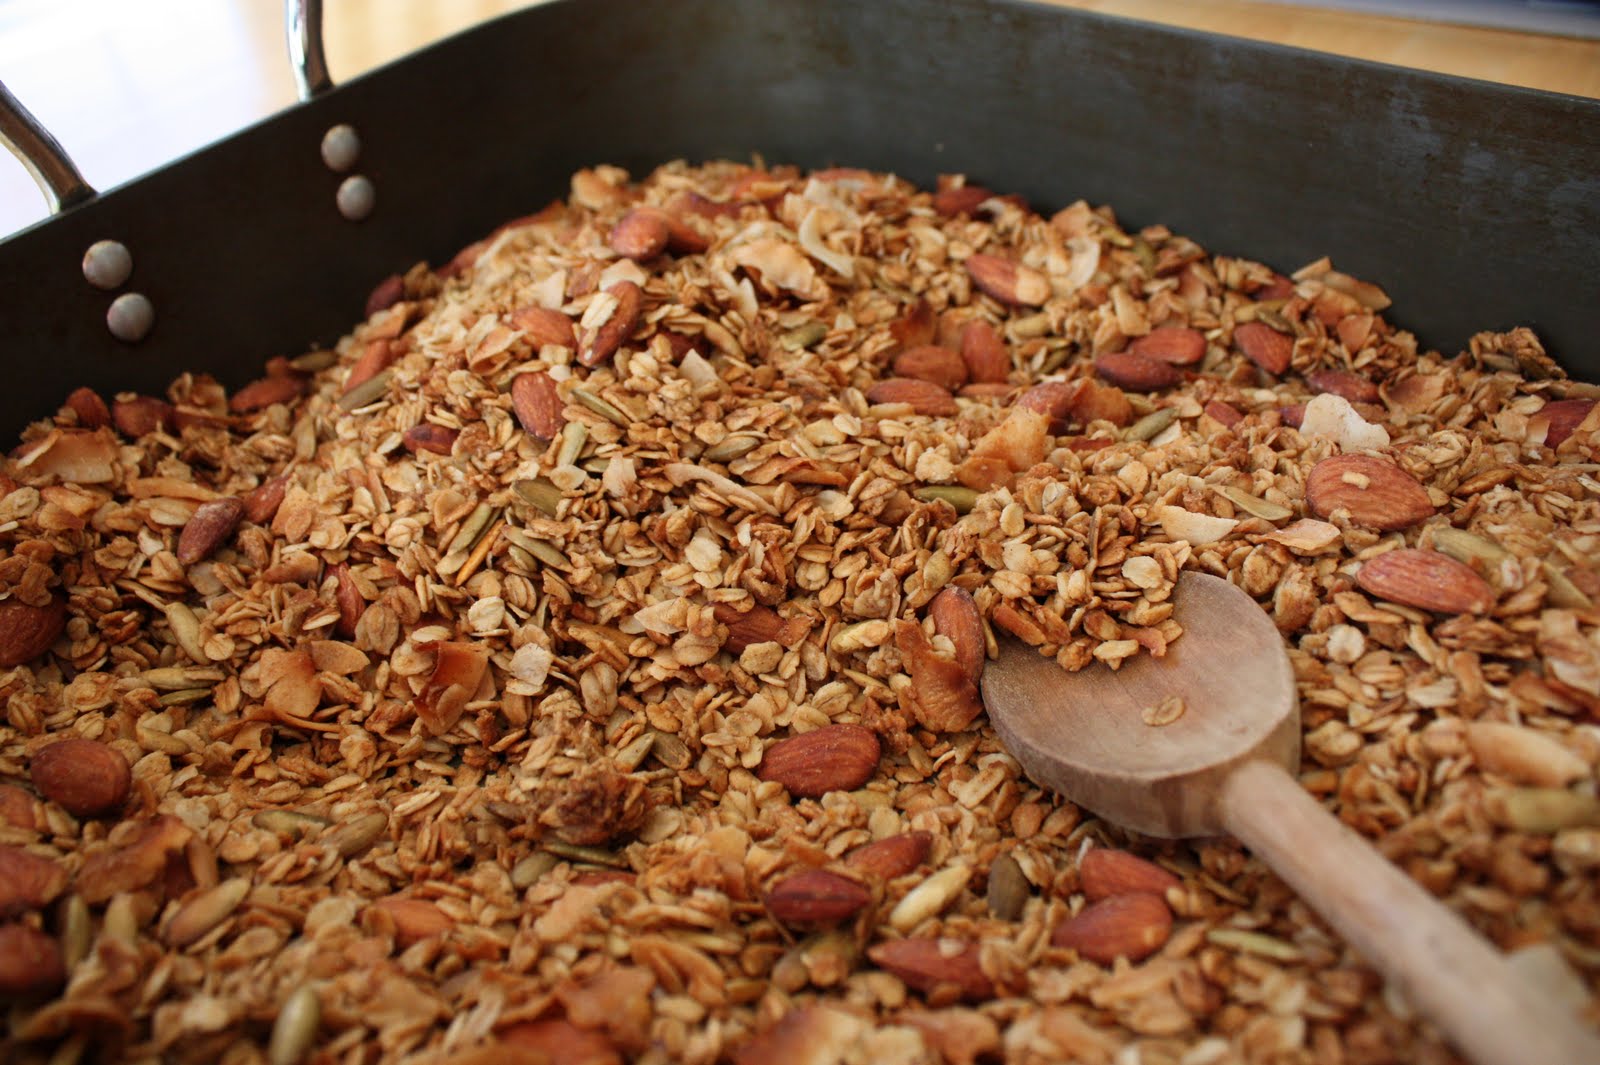
 A few years back I started making this granola as a holiday gift for friends and family. It was received with so much enthusiasm that I decided to make it our annual thing. This year, the kids were old enough to help out and I discovered that not only is this easy to make, fairly healthy and super tasty, but the kids can help too! An added bonus. Here's what I do, but the truth is, you can tailor this to your taste. If you don't like coconut, take it out and add walnuts or raisins instead. The possibilities are endless!

5 cups old fashioned rolled oats
1 cup unsweetened coconut flakes
1/2 cup almonds
1/2 cup brown sugar
1/2 cup pepitas (hulled pumkin seeds)

combine the above ingredients in a large bowl, then in another bowl (or cup), combine:
1/2 cup pure maple syrup
1/2 cup canola oil
1/2 cup water


pour over the oat mixture and stir until evenly moistened.
spray a large roasting pan with cooking spray and add oat mixture.
bake at 275F for 45 minutes, remove from oven and stir, then bake another 45 minutes until crisp and golden brown.
If you are going to add raisins or other dried fruit, wait until it's done cooking and add it at the end. Cool completely and store.

Pack it up, add a cute gift tag, and you've got a nice homemade gift for friends and family!

 This weekend when I was at my in-laws' house, I got an idea for a Christmas present.
They keep separate towels for drying hands, dishes, and fruits and veggies. Not sure why, any ideas? Anyway, it gave me an idea for an easy present.
 I picked up this set of 5 towels for $4 at Target.
 I happened to have some of this iron on transfer paper lying around. I typed up the words I wanted to use, made sure to "mirror" the image and printed it out. Then ironed it on to white fabric.
Used some fabric scraps to cover up the colored lines on the towels. There are tons of tutorials on embellishing towels with fabric, so I won't show you that here. Here are a few good links: Craftiness is Not Optional, Sutton Grace, Crafterhours, and my favorite....
Voila! A simple present in under an hour.


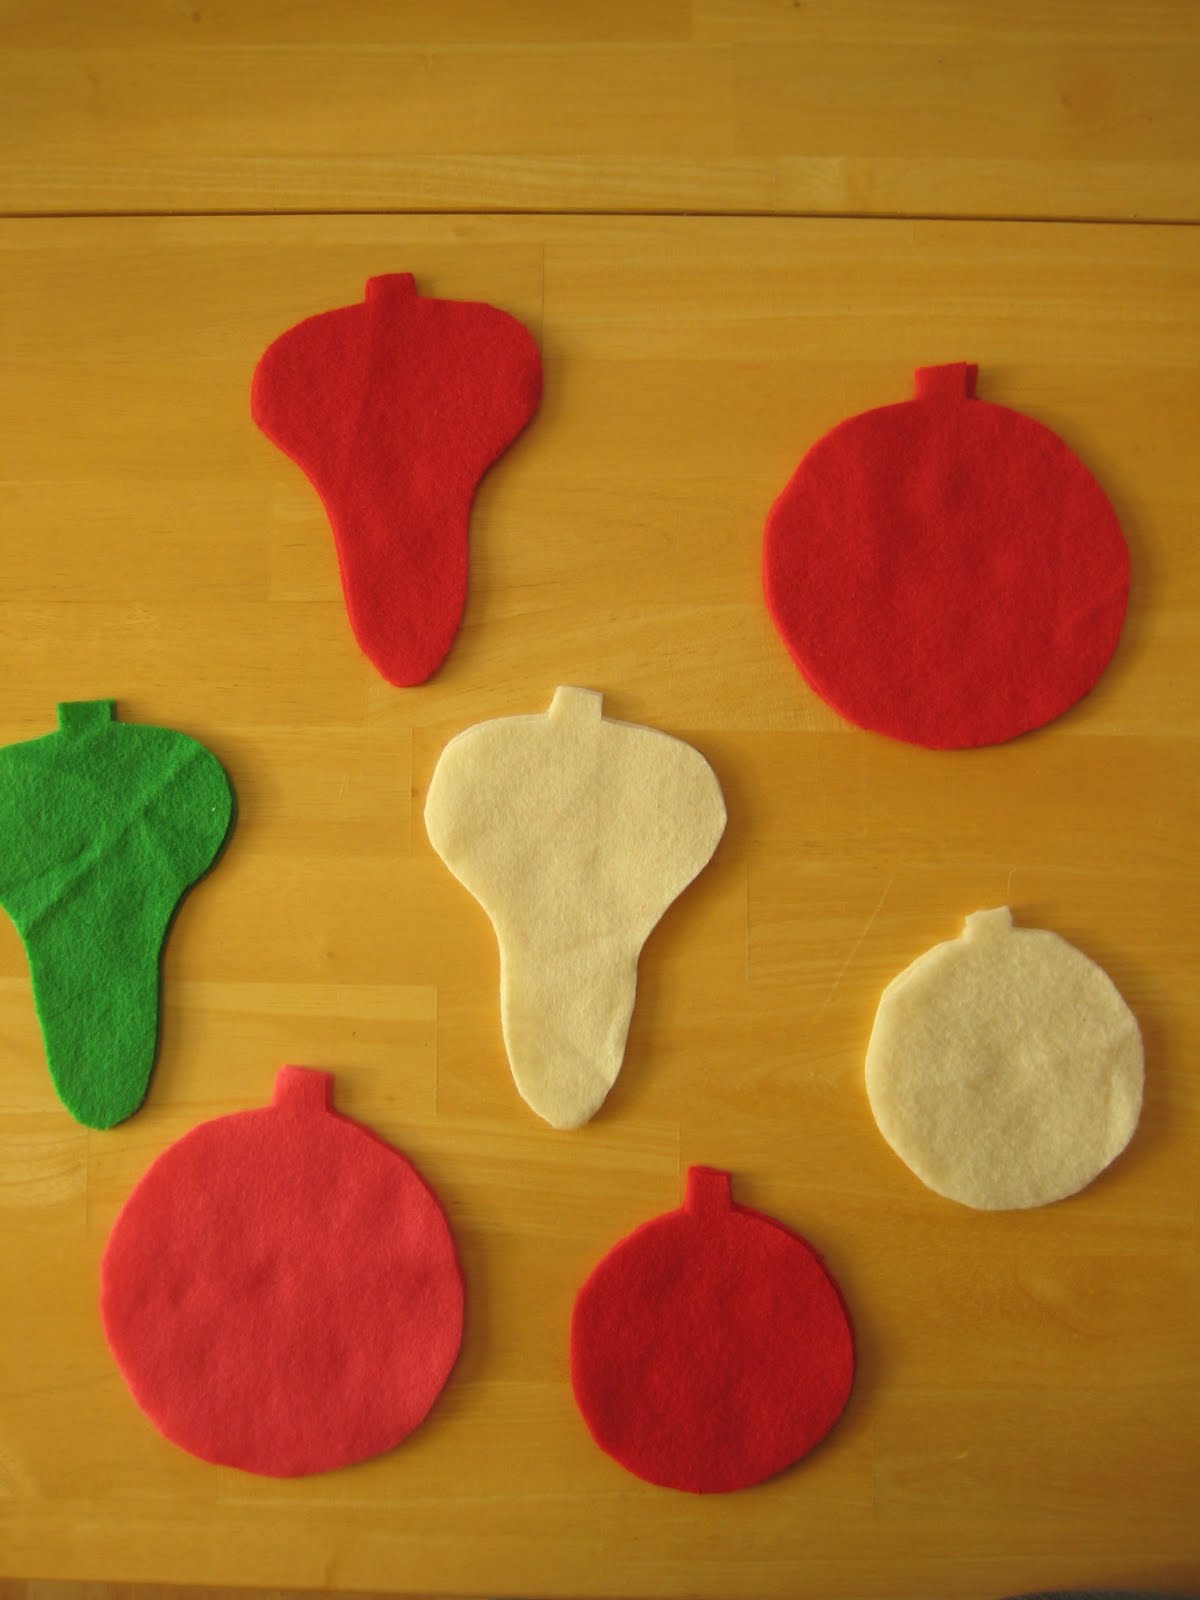
 I've wanted to make an advent calendar for many years and have seen some amazing inspiration out there. Here's one on Purl Bee that I love and Homemade by Jill. But alas, it is December 1 (in a matter of hours) and it hasn't happened. So instead, I came up with this ornament bunting, that has a similar feel, but much less work. What can I say, I'm lazy....Here's what you need if you want to make your own:
- felt in various colors for ornaments
- felt scraps for decorations
- ribbon (to hang individual ornaments)
- ribbon or bias tape (to hang bunting)
- glue (I used a hot glue gun, but any fabric glue will work)
You can find my ornament template HERE, I hope (first time using googledocs)Cut out ornaments, double layered. I made 10 ornaments with 3 different colors. Cut a ribbon strip for each ornament about 12 inches long. Sandwich one end of the ribbon in between the felt layers, pin and sew around. Make sure the end is down far enough to be secured by your stitching.
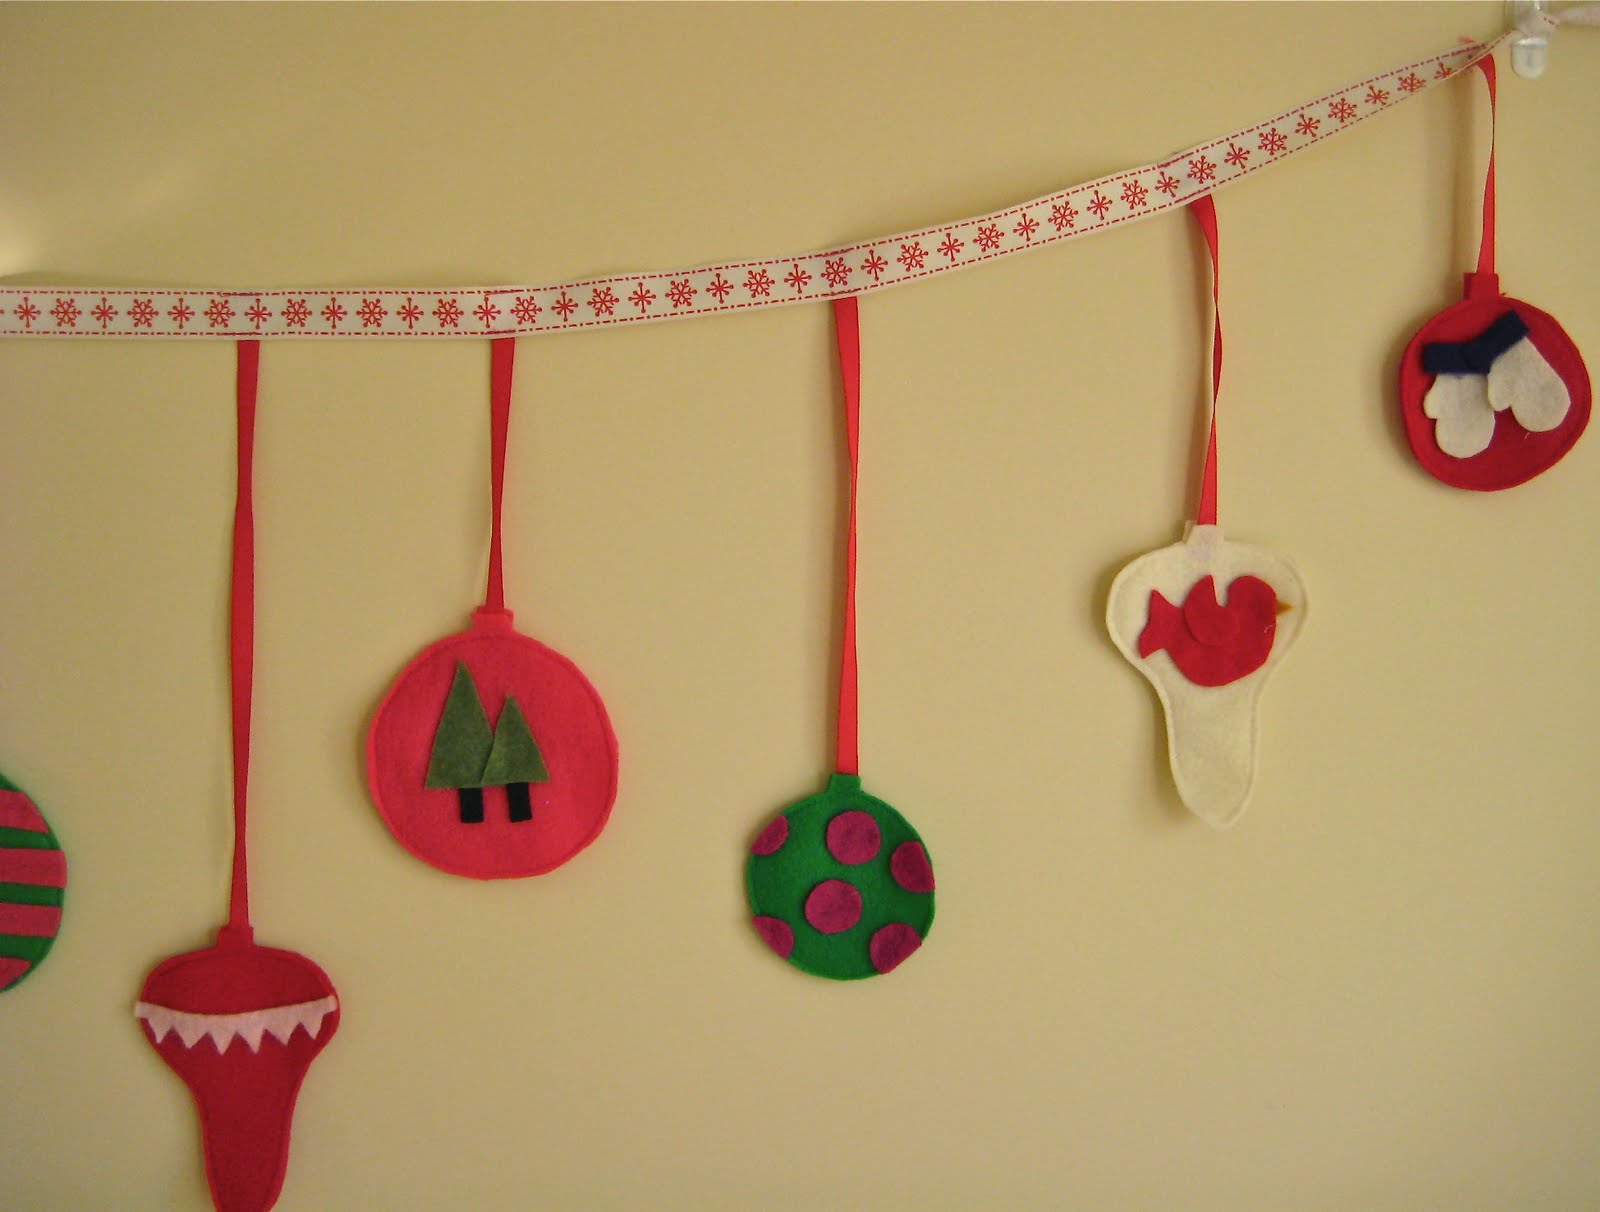
 Here are the ornaments with the ribbon attached.....
 And with decorations glued on! This is the fun part where you get to be creative. I thought about colors and shapes that I like and about things I think about this time of year.....trees, mittens, mistletoe.....
  Next, lay out your ornaments as you'd like them to hang....
  .....and tape them to the floor. Yup, I said TAPE them to the floor. I found this the easiest way to get the height and spacing I wanted.
  Next lay the ribbon (you could also use bias tape) you want the ornaments to hang from and pin them in place.
 Carefully lift the tape off the floor (I had some little helping hands for this part), and sew along the top and bottom of the ribbon catching the ornament ribbon end on both sides.
  All you have left to do is trim off the ribbon ends and hang up your bunting!


 Maybe I'll do a an advent calendar next year.....or maybe another one of these!Enjoy! Send me a pic if you do one, I'd love to see it!


 Need some new earrings? Try this tutorial over at Ginger, Boo and Pickles.
  I made mine smaller and changed the shape slightly. I love that she uses recycled plastic. Chances are you've got everything you need to make these lying around the house.
 Here's another beautiful necklace I saw recently.


