 Here in the Northeast, it has been exceptionally hot and humid. I realized one day that I've been dressing my daughter in tanks and shorts, but I didn't have any tanks for my son. I had picked up a "muscle" T in the clearance section and decided to make a few. Here's what I did.....
 I used the tank I had, but you could also use a shirt to trace a pattern for the front and back without the sleeves. Remember to add a little for the seam allowance on the sides and shoulders, but to cut the armholes exact since you'll be adding ribbing later. For this shirt I upcycled a shirt I bought at a thrift store. I try to find XL shirts, since you get the most fabric out of them.
  If you're using a recycled shirt, cut along the seams carefully. I was able to make this tank using only the front of the shirt and the existing hem.

I like to trace patterns on knit fabric because it's a little easier to keep the fabric in place while you're cutting. But you could also just pin your pattern down and cut.
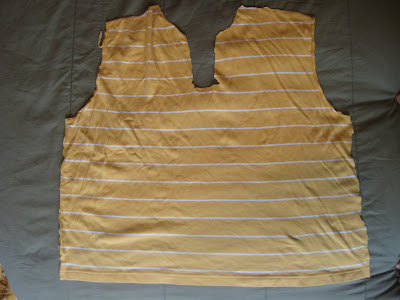
Next, sew the sides and shoulders.

I'm going to finish off the neck and armholes using a rib knit. Rib knits stretch a lot and I know there's a rule out there about how much to use....something like 2/3 of the opening size....I usually just fudge it. So I measure the neck and armhole openings and then cut the ribbing a little shorter. I cut my ribbing 1.5 inches wide and then fold it in half. There are a lot of different ways to finish the arms and neck. I like the look of having the serged-edge like in the 90 minute shirt tutorial on Made. But I can't figure out how to get mine to not break apart when the neck stretches, you know what I mean? Anybody with tips, I'd love to hear it. So I tried it with and without a serged edge on this shirt. If you want to see how to do the serged edge, go see the tutorial mentioned above.  Cut the ribbing to your desired length. Align the short ends, right sides together and sew, making a loop. Fold in half and press. Sorry, I didn't take better pictures of these steps....
Align the seam you just made with the side seam of the shirt. You also want to match the raw edges, so the folded edge of the ribbing is facing away from the arm or neck hole. Pin in place and sew all around.
 Iron the seams flat to the inside and you're done!Doesn't he look cute! And much cooler too!
 I'm new at these tutorials, so I'd love to hear what you think. You could also do these for a girl, they're very simple and can be embellished with a cute applique.Send me a picture if you make one, I'd love to see it!


