
 I've wanted to make an advent calendar for many years and have seen some amazing inspiration out there. Here's one on Purl Bee that I love and Homemade by Jill. But alas, it is December 1 (in a matter of hours) and it hasn't happened.
 So instead, I came up with this ornament bunting, that has a similar feel, but much less work. What can I say, I'm lazy....
Here's what you need if you want to make your own:
- felt in various colors for ornaments
- felt scraps for decorations
- ribbon (to hang individual ornaments)
- ribbon or bias tape (to hang bunting)
- glue (I used a hot glue gun, but any fabric glue will work)
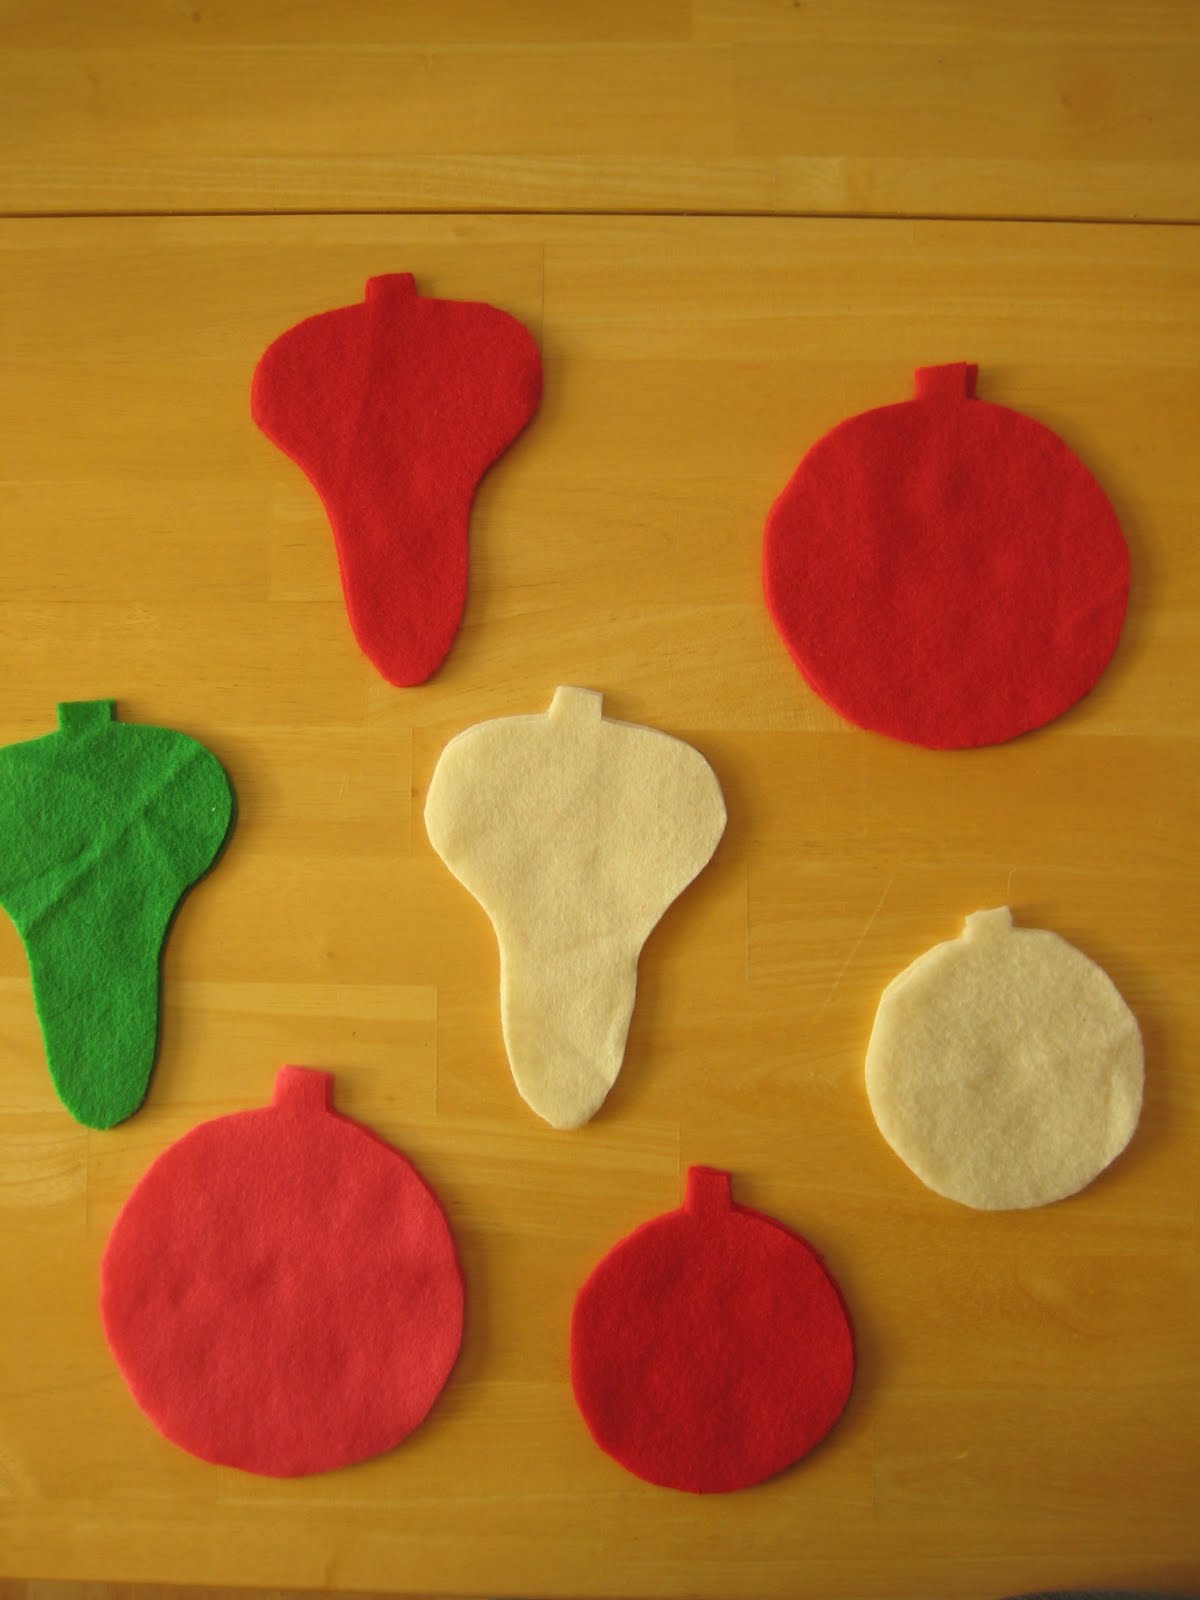
Cut out ornaments, double layered. I made 10 ornaments with 3 different colors.
Cut a ribbon strip for each ornament about 12 inches long. Sandwich one end of the ribbon in between the felt layers, pin and sew around. Make sure the end is down far enough to be secured by your stitching.

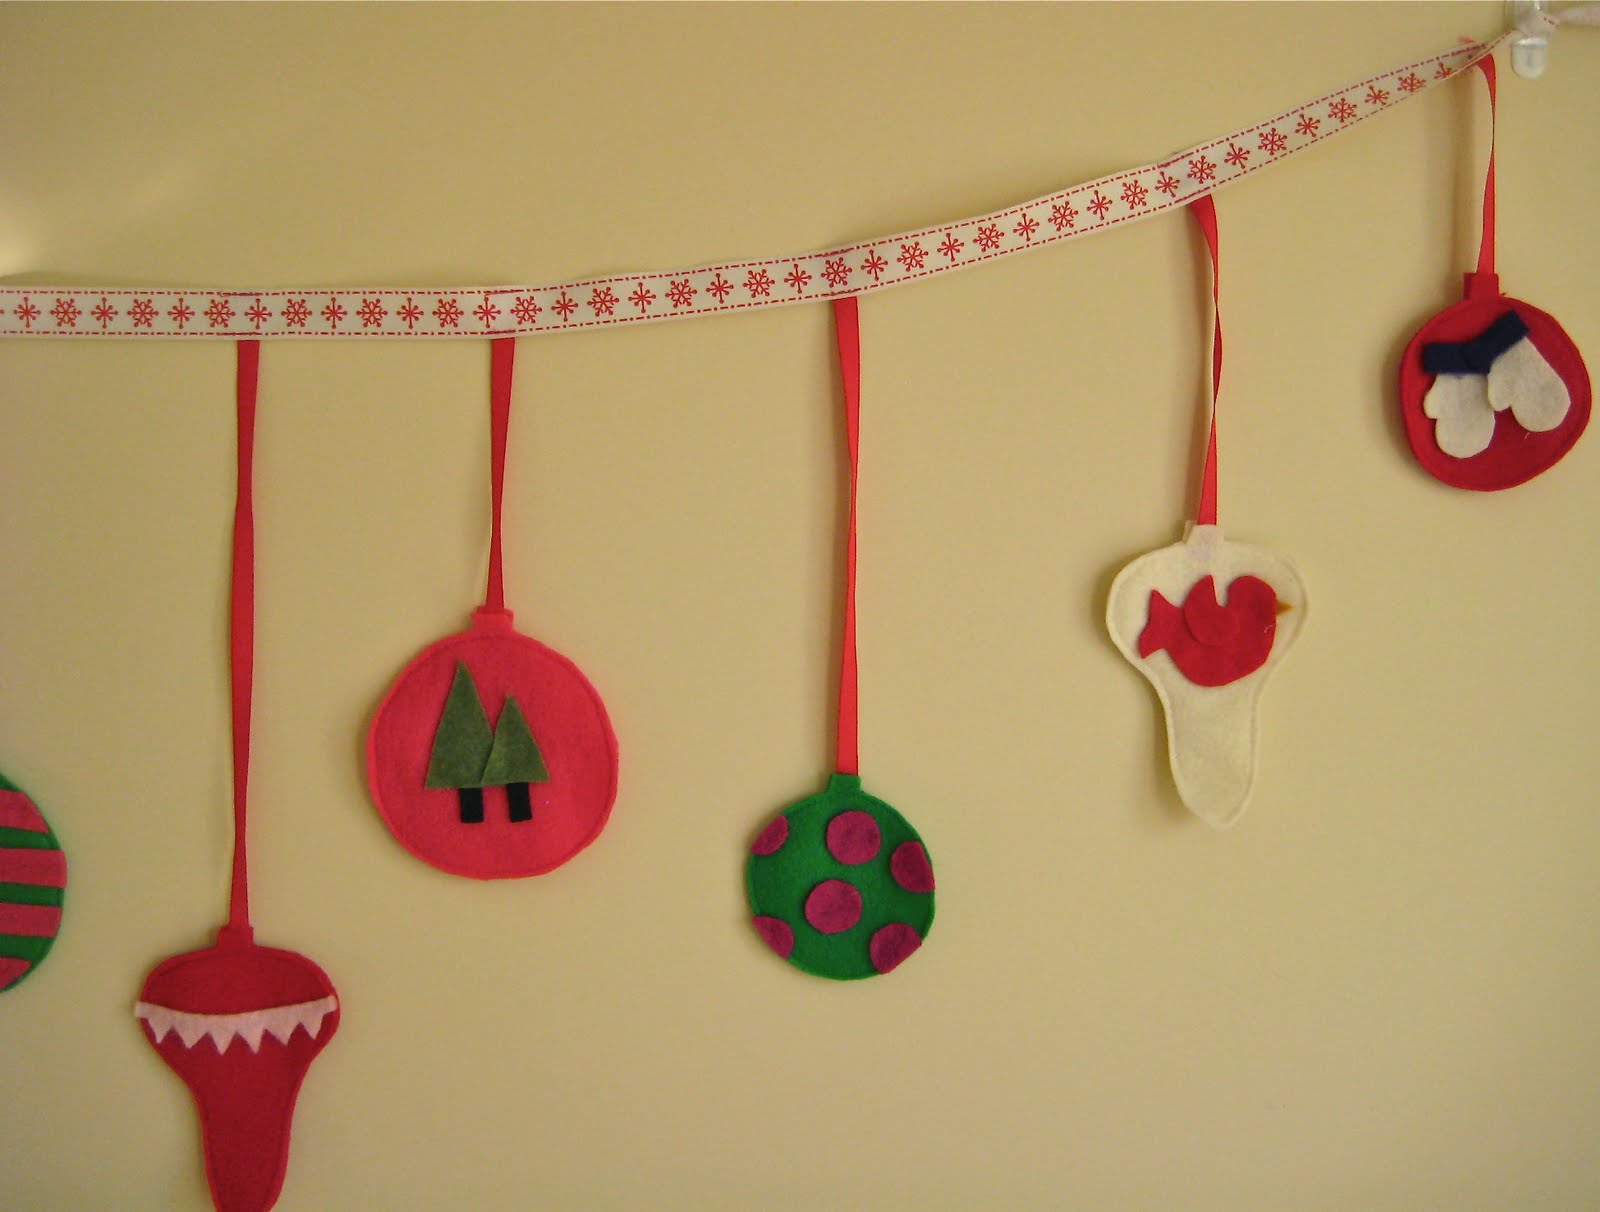
 Here are the ornaments with the ribbon attached.....
 And with decorations glued on! This is the fun part where you get to be creative. I thought about colors and shapes that I like and about things I think about this time of year.....trees, mittens, mistletoe.....
  Next, lay out your ornaments as you'd like them to hang....
  .....and tape them to the floor. Yup, I said TAPE them to the floor. I found this the easiest way to get the height and spacing I wanted.
  Next lay the ribbon (you could also use bias tape) you want the ornaments to hang from and pin them in place.
 Carefully lift the tape off the floor (I had some little helping hands for this part), and sew along the top and bottom of the ribbon catching the ornament ribbon end on both sides.
  All you have left to do is trim off the ribbon ends and hang up your bunting!


 Maybe I'll do a an advent calendar next year.....or maybe another one of these!
Enjoy! Send me a pic if you do one, I'd love to see it!


