Showing posts with label summer. Show all posts

5.30.2013

High Low Maxi Skirt - TUTORIAL

 
Two years ago I bought a cute maxi skirt.  Looking in my closet the other day I realized, I've never worn it.  I always admire maxi skirts on other people.  But, when I look closely, I'm reminded of why I never wear them myself.  Most of the time, people are holding them up as they walk.  Not very practical, especially when you're spending your day at work or with kids, or both!
So, in the midst of my sewing slump, I had an epiphany.  I love the high-low skirt trend and I love the maxi skirt trend.  Why not a high-low maxi skirt!
This skirt is super easy to make and even easier to wear.  
Are you with me?  Let's get started.

All you'll need is 1.5-2.5 yards of stretchy fabric, depending on your height and size.  I only had a yard, so I made my waistband from a different color.  I used a rayon jersey knit that was very drapey and stretchy.
My 1 yard of fabric (36 by 60 inches) was the perfect length and width for my skirt.  In the photo above, I have the fabric folded in half for the skirt front and back.
 Fold the fabric in half again, so now it's quartered.  Measure around your waist, divide by 4 and add 1.  Using that measurement, make a mark that distance from the fold.  Now draw and angled line all the way to the bottom and cut. You should end up with a nice looking A-line shape.
 With right sides together, sew side seams.

Now let's do the waistband.  I ran out of the main fabric, so I'm using a different color.  Cut a piece of fabric that is 2/3 your waist measurement by 8 inches, and with right sides together, sew short sides making a loop.
Fold the waistband in half with wrong sides together, matching raw edge.
 Match the raw edge of the waistband to the raw edge of the skirt, pin and sew.
 Your skirt is almost done!
 Now, let's make the high low hem.  Lay the skirt flat so the the side seams are matched up.  Figure out how high you want the front, keeping in mind you'll still need to hem the skirt.  Draw a nice angle from the front to the back and cut.
 Fold the bottom of the skirt 1 inch to the wrong side and topstitch to hem. When you hem, keep in mind you'll be able to see the wrong side of the back of the skirt.  I used white thread for my bobbin and didn't realize until later that you can see it from the front.  Oh well, I definitey see another one of these in my future.

So fun.  So versatile.

7.09.2012

Strawberry Goat Cheese Salad

I'm so excited to be guest posting as part of Roselee of Jane of All Trades, Summer Salad Series.  If you haven't checked it out yet, it's definitely worth a stop over.  
When it's hot and muggy out, who wants to turn on the stove or oven?  The perfect reason for a summer salad.

Here's what you'll need to make my Strawberry Goat Cheese Salad with a honey ginger dressing.

SALAD
salad greens
1 1/2 cups fresh strawberries, quartered
1 log of goat cheese
1/2 toasted pecans, finely chopped
1/4 cup thinly sliced red onion

DRESSING 
1 tablespoon olive oil
1 tablespoon honey
1 tablespoon water
1/2 inch fresh ginger, peeled and crushed
fresh ground black pepper to taste

Slice the goat cheese into rounds.

Gently roll the rounds in the ground pecans.
Place on a plate and refrigerate while you prepare the dressing.

Mix the oil, honey and water in a measuring cup. 
Grind up your ginger.  I use a mortar and pestle, but you could also shred it. 
Squeeze the ginger in with the oil, honey and water.  Whisk in a little black pepper.
Toss the salad greens, strawberries, onions, and any leftover pecans with the dressing.
Top with the goat cheese rounds.  Pair it with a nice grilled chicken breast and you've got a great summer meal.  
Go check out all of Roselee's great summer salads here
What's your favorite summer salad?

2.28.2012

More Swimsuit Supplies

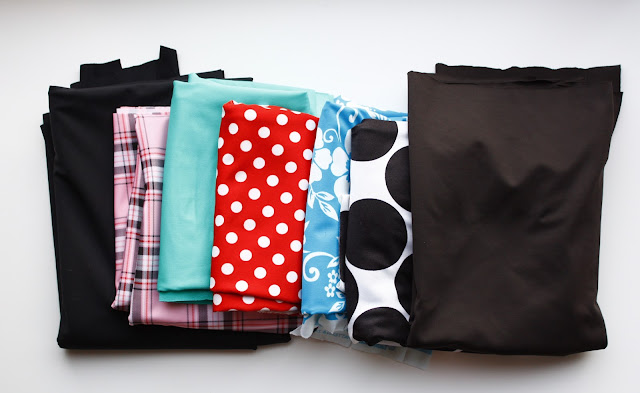
 I may have gone a little overboard here, but I just couldn't help myself!  My local warehouse fabric store that mostly stocks home dec fabrics, happens to have an amazing selection of swimwear fabric.

If you are thinking about making one, I think what you want is either nylon/spandex or polyester/spandex, not cotton/spandex.  I'm certainly no expert, so feel free to correct me if I'm wrong.  The first suit I made was a polyester/spandex blend, but all of those fabrics above are nylon/spandex.  It's a little thicker, but the poly/spandex worked just fine and might be easier to find. 


After searching around for swimwear sewing tips, I came across this site.  I wish I had seen their tips before.  I had bought some fancy elastic that I thought was the right kind, when in fact the regular elastic I had in my drawer says right on the back that you can use it for swimwear.  Go figure!

  
Before I had a chance to really read over the Creative Chicks tips, I tried making a pair of bottoms for myself.  They came out pretty good, though a little small.  


I folded the top over twice and then did a zig-zag.  It looks much nicer than the leg openings which I just folded once.  
 
The seam flattens out when it's on my body, but is still a little wonky.  With the Creative Chicks tips in hand, I'm confident the next suits will be just right.  

Are you inspired to make your own yet?

6.05.2011

Boy's Muscle Shirt Tutorial Revisited

Last summer, I put together one of my first tutorials for a boy's muscle shirt. At that point, I only had a handful of posts up, and I don't feel like I really did the tutorial justice. So, now that it's summer again, and I'm feeling inspired by CTB Summer edition, I decided to add some updates to the tutorial.

First, I'll start off with how to make a pattern from a shirt.

Fold the shirt in half, inside out (I do this so I don't accidentally get marker on the outside) and lay it on your paper. As a side note, I use a roll of plain colored wrapping paper to make patterns. Much more economical than actual "pattern paper"


Trace around the sides, adding seam allowances to the shoulders and sides and mark the bottom of the neck where the ribbing meets the body.

I also mark my pattern for where the bottom hem would be if I'm re-purposing a shirt and using an existing hem as well as add 1/2 inch for hemming for when I'm not using an existing hem.

To finish drawing the shoulder and neck lines, hold the sleeve at the seam and trace. Do the same for the neck.

Here's my finished pattern for the front.

Cut out the pattern and lay it on top of the folded shirt to make any necessary adjustments. I ended up cutting a little off the shoulder and side seam allowance.

Another side note, pattern weights help a lot when making patterns and cutting knits. And, you can make your own with my pattern weights tutorial. They also double as fun sewing rooms toys for little ones.

OK, now on to the pattern for the back. First, trace your front pattern around all sides except the neck.


Then lay your shirt on top and mark the neck where the shirt body and neck ribbing meet. Draw the neck curve the same way you did for the front. Cut out the pattern and make any adjustments.

OK, now that we've got a pattern, we can make our shirt. My original tutorial has more detailed instructions, but I've added a little more detail about making the ribbing for finishing the armholes and neck here.

For this shirt I'm going to re-purpose a thrift store shirt from my stash, using the cute graphic on the front.

Here are the front and back pieces I cut using my pattern.


Sew side seams and shoulders with right sides together. Turn right side out and press.

Next we will need to make ribbing bands to finish the openings. Measure the neck and armhole openings. We will be using strips of ribbing 1.5 inches wide and 1 inch shorter than the measured opening.

So, my armholes were about 8 inches all the way around, so I cut 2, 7 x 1.5 inch strips. The neck was 14 inches all the way around so I cut another strip 13 x 1.5 inches.
Next, fold the strips in half matching the longer sides and press well.
Open up the folded strips, match the shorter sides, right sides together and sew with a 1/4 inch seam. I used my serger for all the seams, but you could also use a regular sewing machine. I would recommend using a longer stitch length than you would use on woven fabric or a wide zig zag.

Fold the ribbing back up with the seam allowance on the inside.

My original tutorial shows show to pin these ribbing bands to the shirt and sew in place. Basically, you match the raw edges on the ribbing with the raw edges on the armhole, pin and sew. Probably easier to understand when you see the pictures.

For this shirt I used my twin needle to sew a top-stitch along the neck and armholes. This is totally optional, but gives the shirt a more finished, store-bought look. It's helpful to iron your finished seams with a good amount of steam. It makes the fabric shrink up if it's been stretched and come together better.

All that's left on this shirt is the hem. Since I wanted to use the graphic on the shirt I was upcycling, I couldn't use the existing hem. So, I serged around the bottom, then folded it up 1/2" and used my twin needles to sew it in place.


Done! In the time it's taken me to write this post, I probably could have made 3 of these muscle shirts, they're that easy!

A perfect fit.

Enjoy. Let me know what you think. There's a lot between the original tute and these additions.....hope it's not too much to digest. Do send me a link or pic if you make one, I'd love to see!