I didn't have any plans to make shorts. But, I've been seeing some Shorts on The Line posts over at Imagine Gnats and discovered the free City Gym Shorts pattern. I love me some free patterns, so why not make some shorts! I ended up modifying the pattern a little bit more for each of the 3 versions I made. Here's what I did.
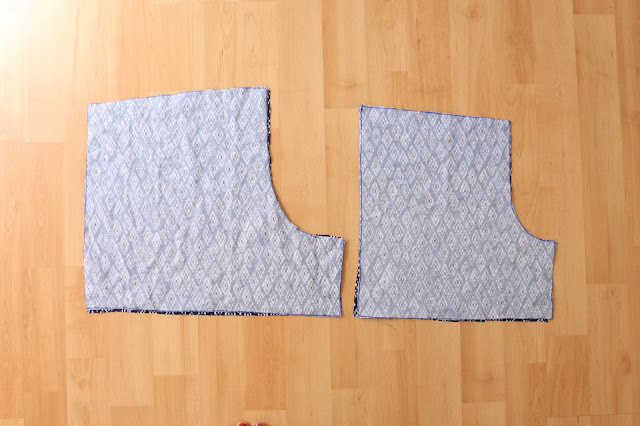
The pictures of these shorts are really wonderful and there are so many great versions out there, but the style just isn't me. So, I decided to modify the pattern so that I could sew them like regular shorts without the bias tape. I just added a bit of a seam allowance to the side and straightened the curve on the bottom.
I also decided to add pockets. I actually followed my own tutorial and pattern for dress pockets which you can find HERE.
This first version came out pretty well. In fact, I'm wearing them as I type this. The fit is more of a pajama short for me. I ended up just serging the bottom since I didn't think they'd be wearable if they got any shorter. The pockets turned out a little small, but truth be told, when I look at the picture, I think they look great. But on my body, they feel a little bit small for my taste.
I also was a little hasty and used my good fabric for my first pair. So, I mustered all the patience I could and made a second pair with fabric that I had sitting around and not my favorite.
For this pair, I added a little bit of length and width to the pattern and made the pockets a little bigger. They are good and I will definitely wear them, but still aren't exactly what I'm after. I decided to print the pattern out one more time and cut in between sizes. Here's a comparison of the pattern I used for my first pair and my final and favorite pair. The piece on the left is what I did for my last pair and the piece on the right is for my first pair.
These shorts are exactly what I had in mind. The fit is amazing. Not to loose, but not too short and tight either. I love that these shorts have an elastic waist, but don't look frumpy.
For this pair, I used the full size pocket from my tutorial and it's perfect. I love the way the side looks and I love this fabric. I was hoping the color and print would work with tops other than white, and I think it does.
So I guess being a little bit obsessive does pay off. And, before I forget, I have to mention that the instructions for this pattern are really great. I didn't get a picture of the inside of the shorts, but I think part of what makes them look so great is the way the waistband is sewn. It ends up being 4 layers of fabric plus elastic, so it's really stable and there are no unfinished seams on the waist on the inside.
There are also kid sizes, so I might try modifying the pattern for a kid version as well. Did I mention how much I love free patterns?


Thank you for showing the progression of changes which you made to the pattern. The final pair fits beautifully!
ReplyDeleteLook at the final photo and you will see that the ONLY thing that you could change would be to straighten the bottom of the pattern so that the hem is level all the way around.
This pattern may be free but your input is priceless!!! The BEST looking pair of shorts that I've seen in years!!!
Suits those gorgeous legs! : )
love them! now I think I need to make some more ;)
ReplyDeleteI love these! Am a little obsessed with shorts at the moment, and with plenty of fabric leftover from other projects, these are just a must :)
ReplyDeleteThank you for the free pattern tip and the hints on a better fit. I need shorts for summer and this may just be the ideal pattern
ReplyDeleteAh, the best thing about making your own clothes - pockets!
ReplyDeleteThe last pair are just fab (the others are nice too of course) I think I need to rustle up a pair before our holiday this year, this pattern looks like a good choice - thanks.
Love the modifications, great job!
ReplyDeleteYour persistence really paid off they look great on you!
ReplyDelete