Update: You can take this pattern from a one-piece to a two-piece. Instructions HERE.
At first I was really intimidated by the thought of trying to make a swimsuit, but with some trial and error and some help from the Creative Chicks I did it....and you can too!
A few tips before you get started:
- Take your time! I'm not usually someone who pins a lot, but it definitely pays off for this one
- I found using a walking foot helpful
- I used a serger for some of my seams, but it's really not necessary since swimsuit fabrics don't unravel
OK, let's dive right in :)
Here's what you'll need:
- around 1/2 yard (or less) of swimwear fabric (nylon/spandex or polyester/spandex)
- 3/8 inch swimwear elastic *see this post for more info on supplies
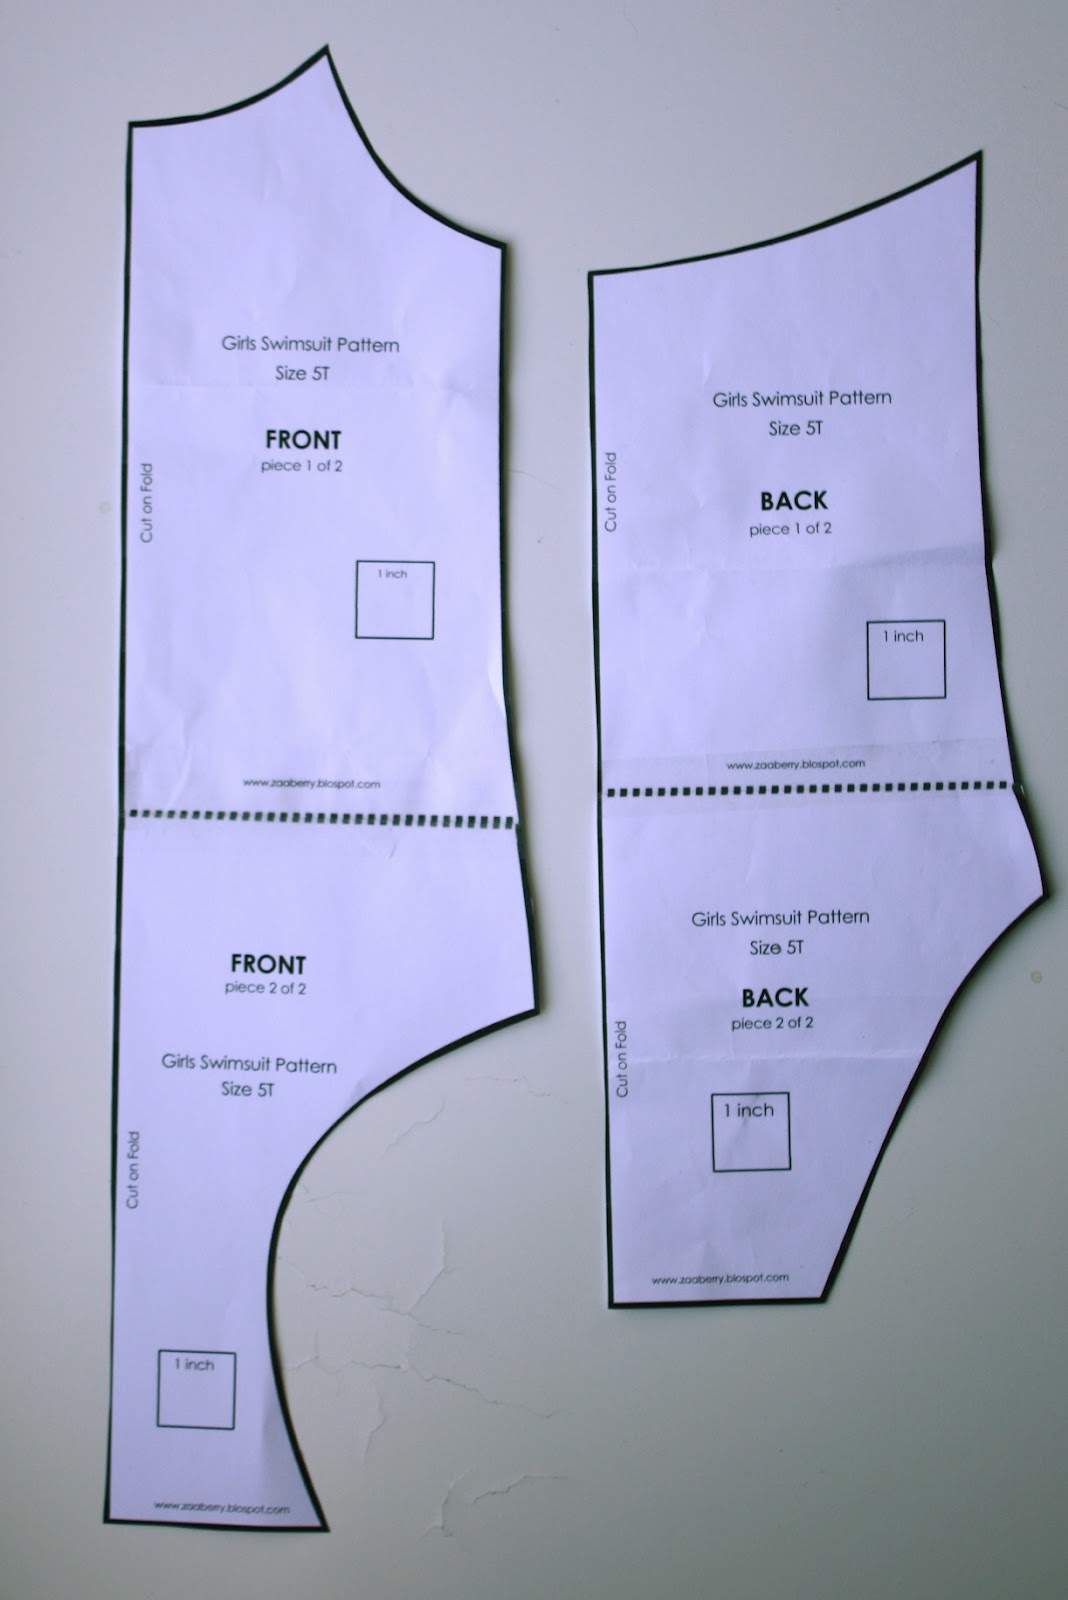
First, download and print the pattern here. To assemble the pattern, match the dotted lines and tape together. Then cut out the pieces. You should have a front and back.
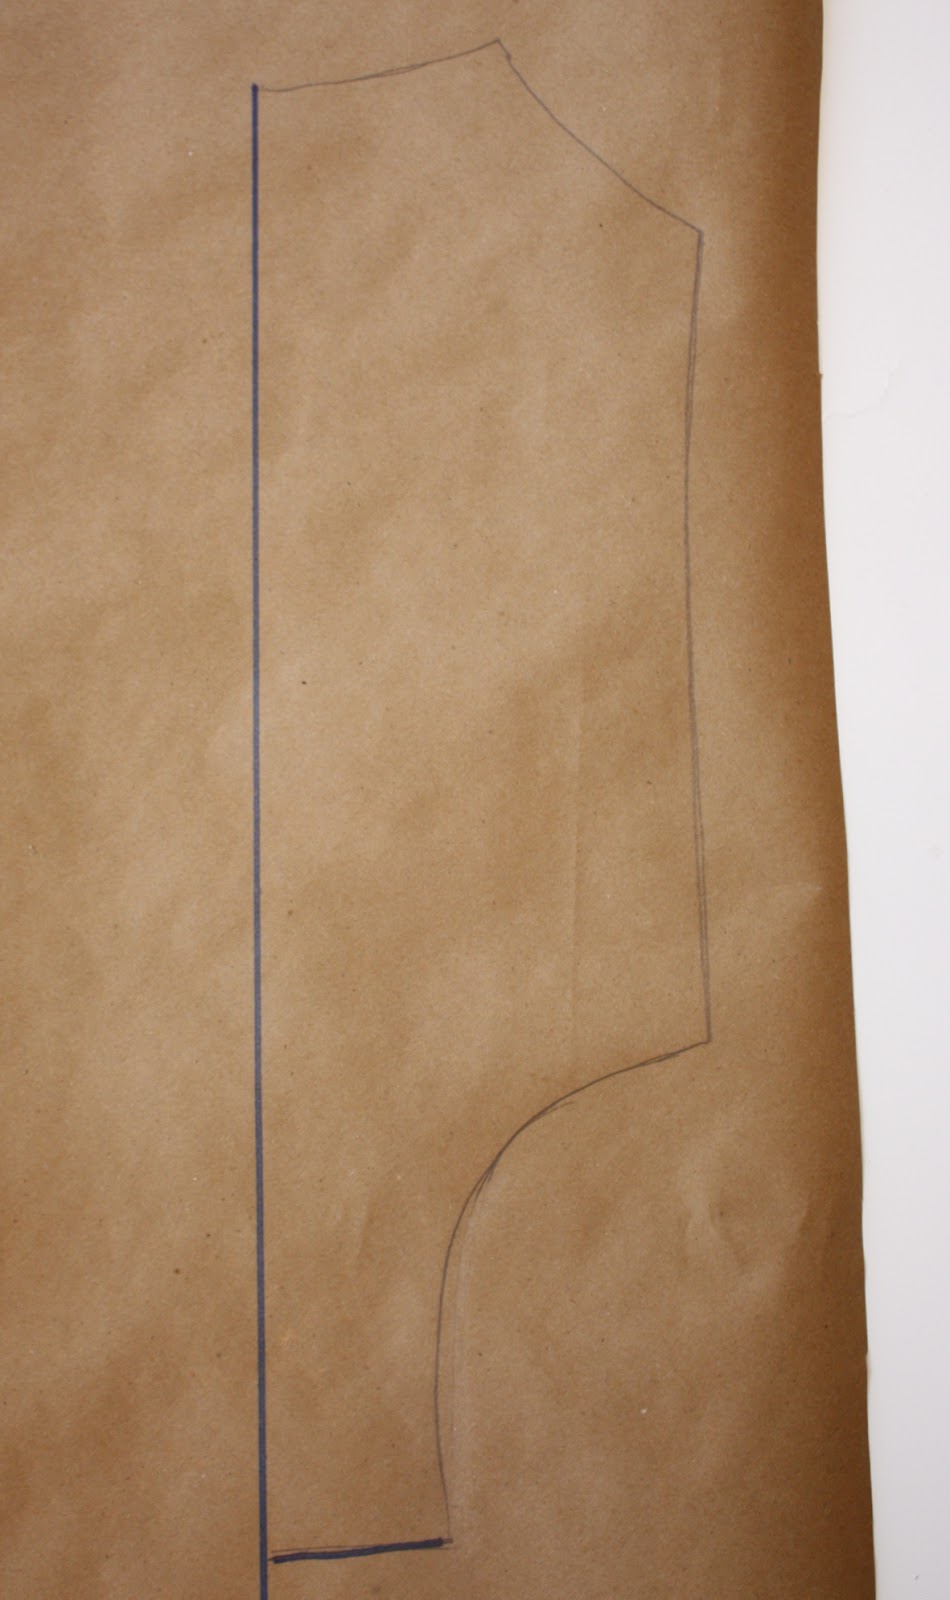
UPDATE: I've put together a tutorial for making your own pattern here.
All seam allowances are 1/2 inch unless otherwise noted.
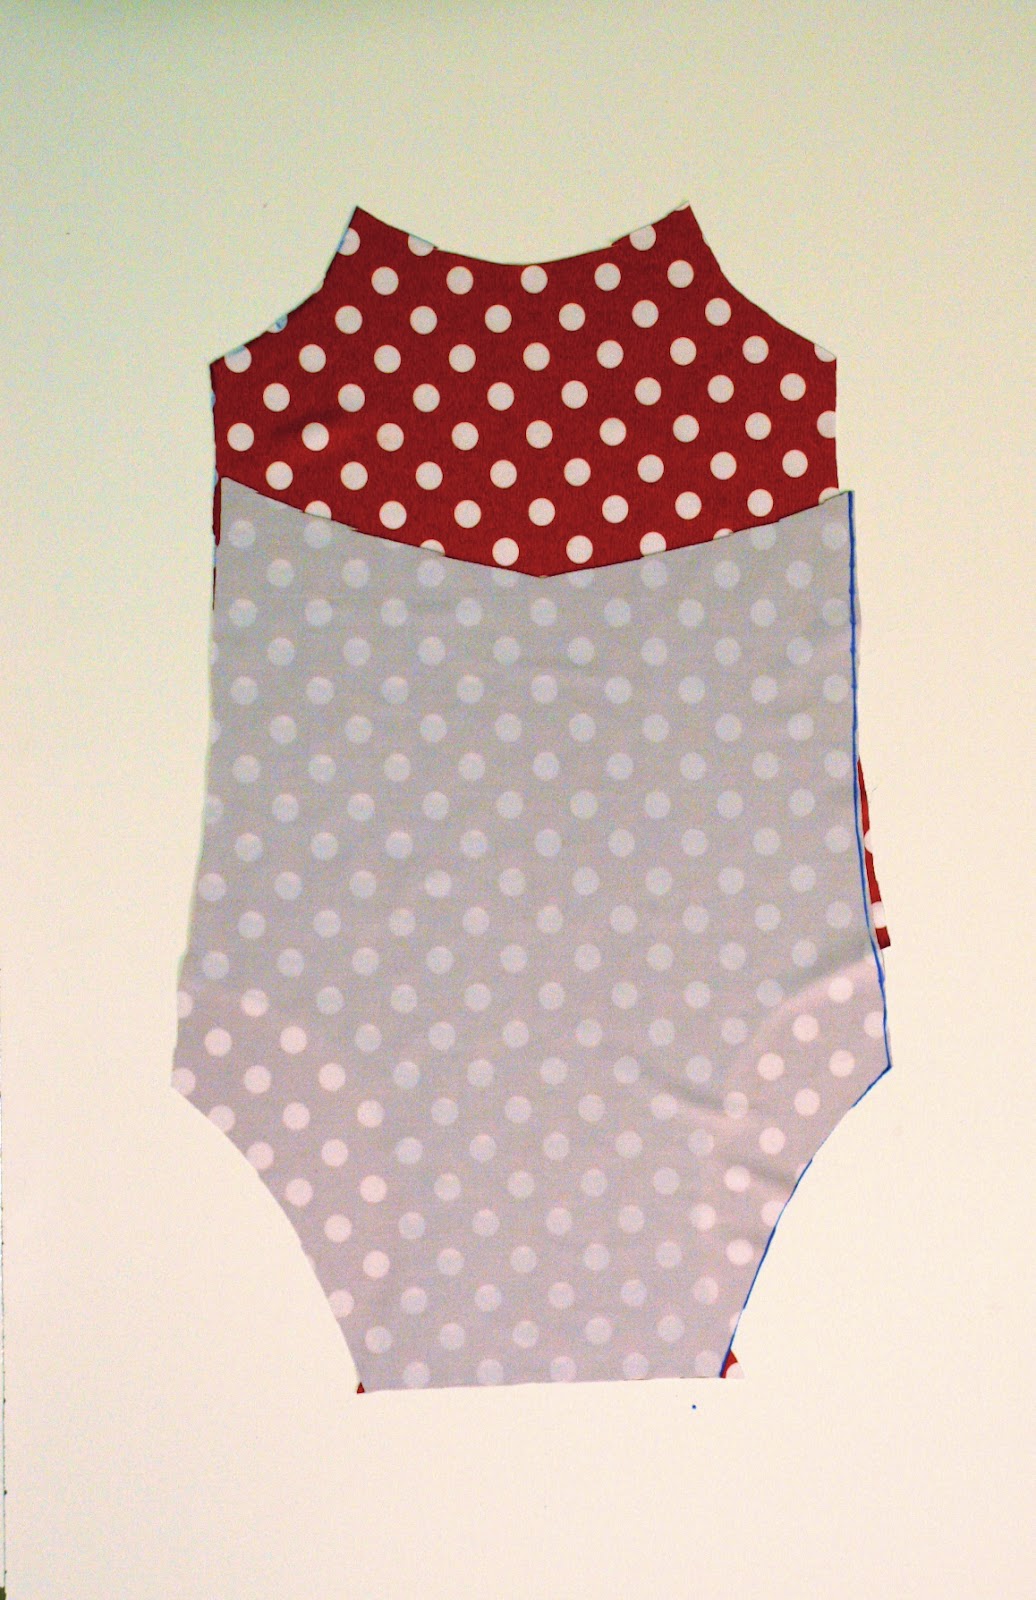
Cut a front and back piece laying the pattern on the fold. In this tutorial, I lined just the front, so I also cut a front piece from the lining fabric as well (not pictured).
Lay the back piece on top of the front piece, with right sides together.
If you are adding a lining, lay the lining piece on top of the back piece and pin at the crotch.
Sew across the crotch with 1/2 inch seam allowance.
Flip the lining piece over the seam to the front, and you've added the lining and enclosed the seam.
Sew the front and the back together at the sides with a 1/4 inch seam allowance. Make sure to catch the lining as well, it can be slippery!
Cut 2 pieces (one for each leg opening) of elastic, 13.5 inches each. Sew the ends of the elastic together to make a loop.
Along the front side of the leg opening, pin the elastic without stretching the elastic or the fabric. There will be extra fabric along the bum side. You will stretch this as you sew. Pin the center of the remaining elastic to the center of the bum side of the leg opening.
Sew along the edge of the elastic. Your elastic should be flush with the edge of the fabric, mine is over a little too far. Start on the front and stretch the elastic to fit when you get to the bum side.
 Here's what it should look like after sewing.
 Fold the elastic to the inside and top-stitch. I used a double needle.
Do the same for the other leg opening.
Fold the elastic to the inside and top-stitch. I used a double needle.
Do the same for the other leg opening.
For the ruffle, cut a strip of fabric that is 2 inches by 10 inches. Gather along the top edge. Pin to the top of the suit and then trim along the armholes.
The next step is to add elastic to the top and then enclose it. Cut a strip of fabric 2 inches wide.
1. With right sides together, sew the strip to the top with a 1/4 inch seam allowance.
2. Using a wide zig-zag stitch, and without stretching the fabric or elastic, sew the elastic on top of the strip you just sewed.
3. Fold the fabric over to the wrong side and pin.
4. Top-stitch.

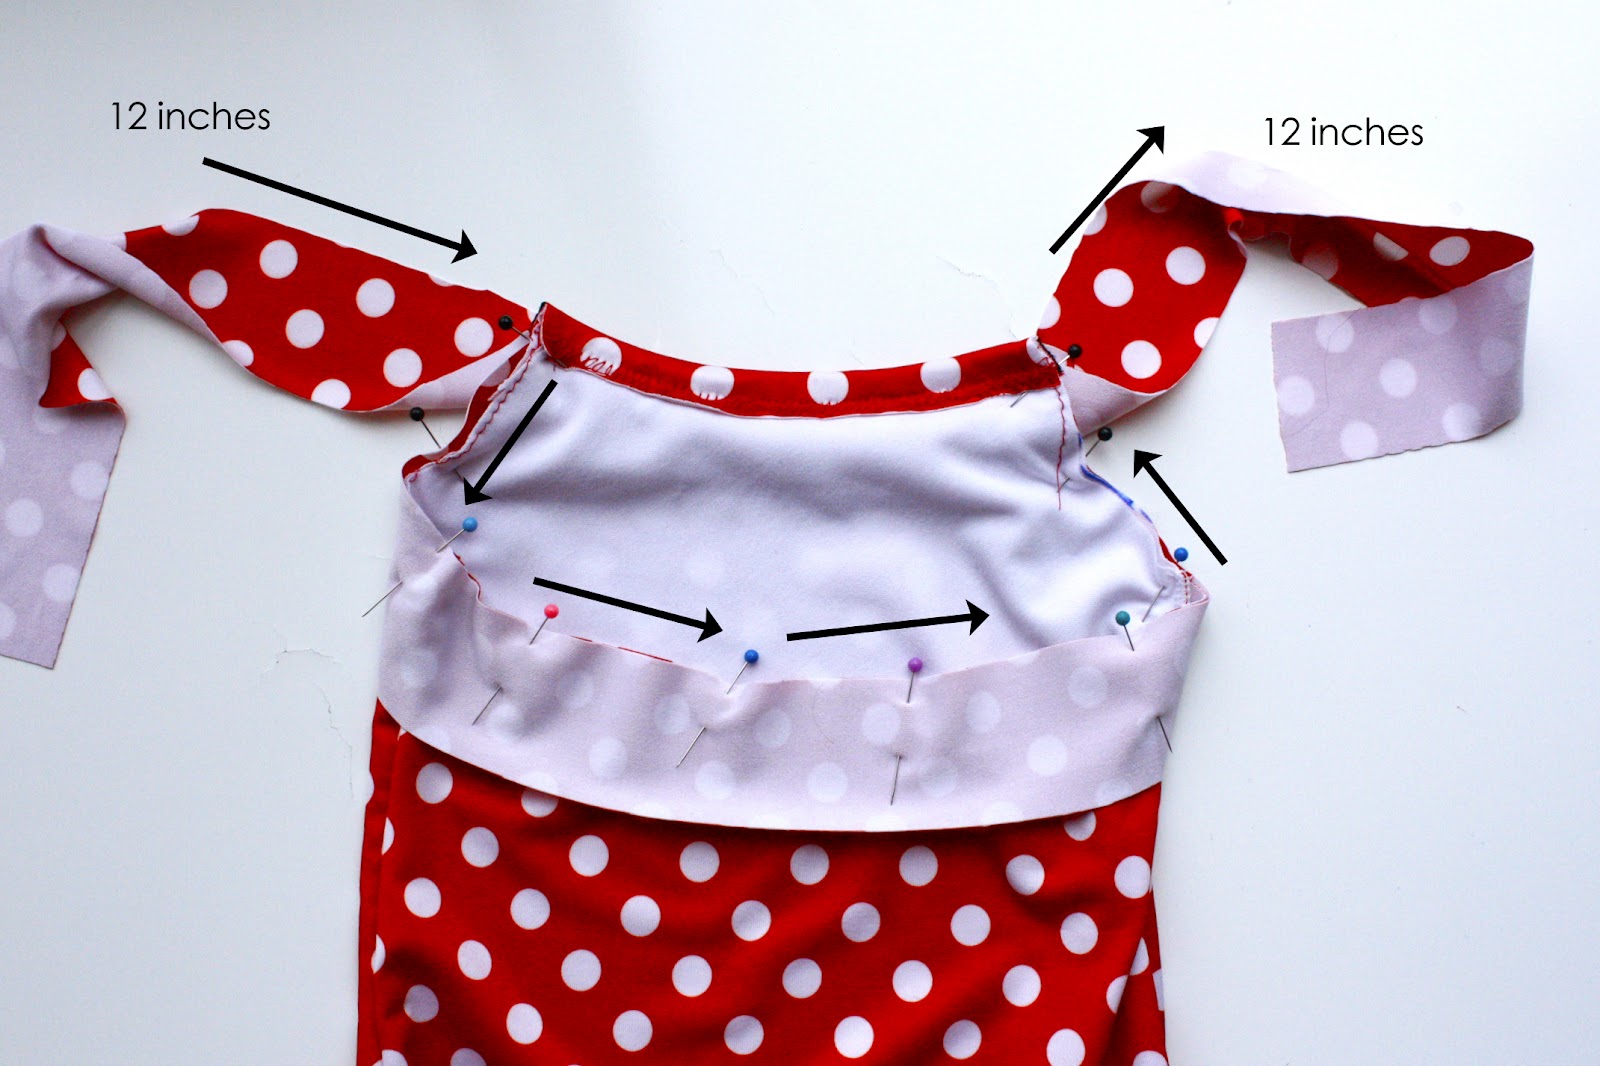
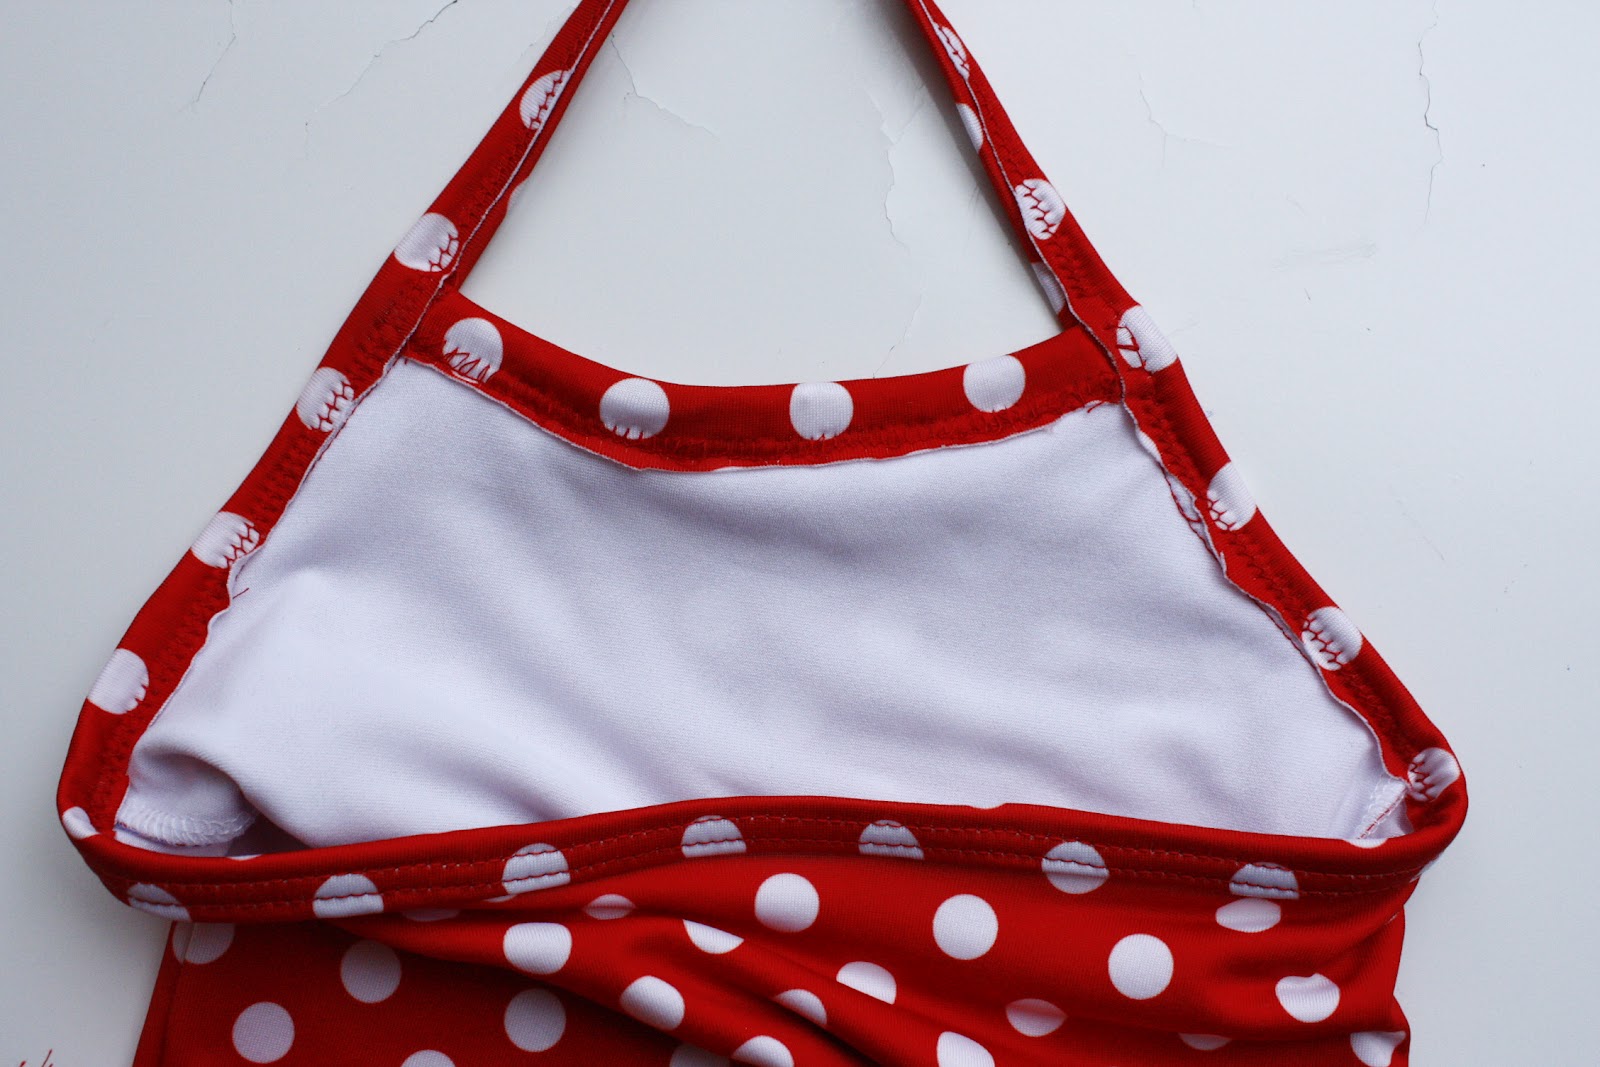
To finish the rest of the top of the suit and create straps, cut a piece of fabric 2 inches by about 42 inches. You want to have about 12 inches on each side that will become the straps.
So, leaving a 12 inch tail on each side, sew the strip with right sides together to the top edge of the suit, just as you did before.
Then sew the elastic on top, just as before. You can see I accidentally stretched mine a little. Don't worry if this happens to you, it will all flatten out later.
Just like before, turn the fabric to the inside and pin.
 Top-stitch.
Trim.
Top-stitch.
Trim.
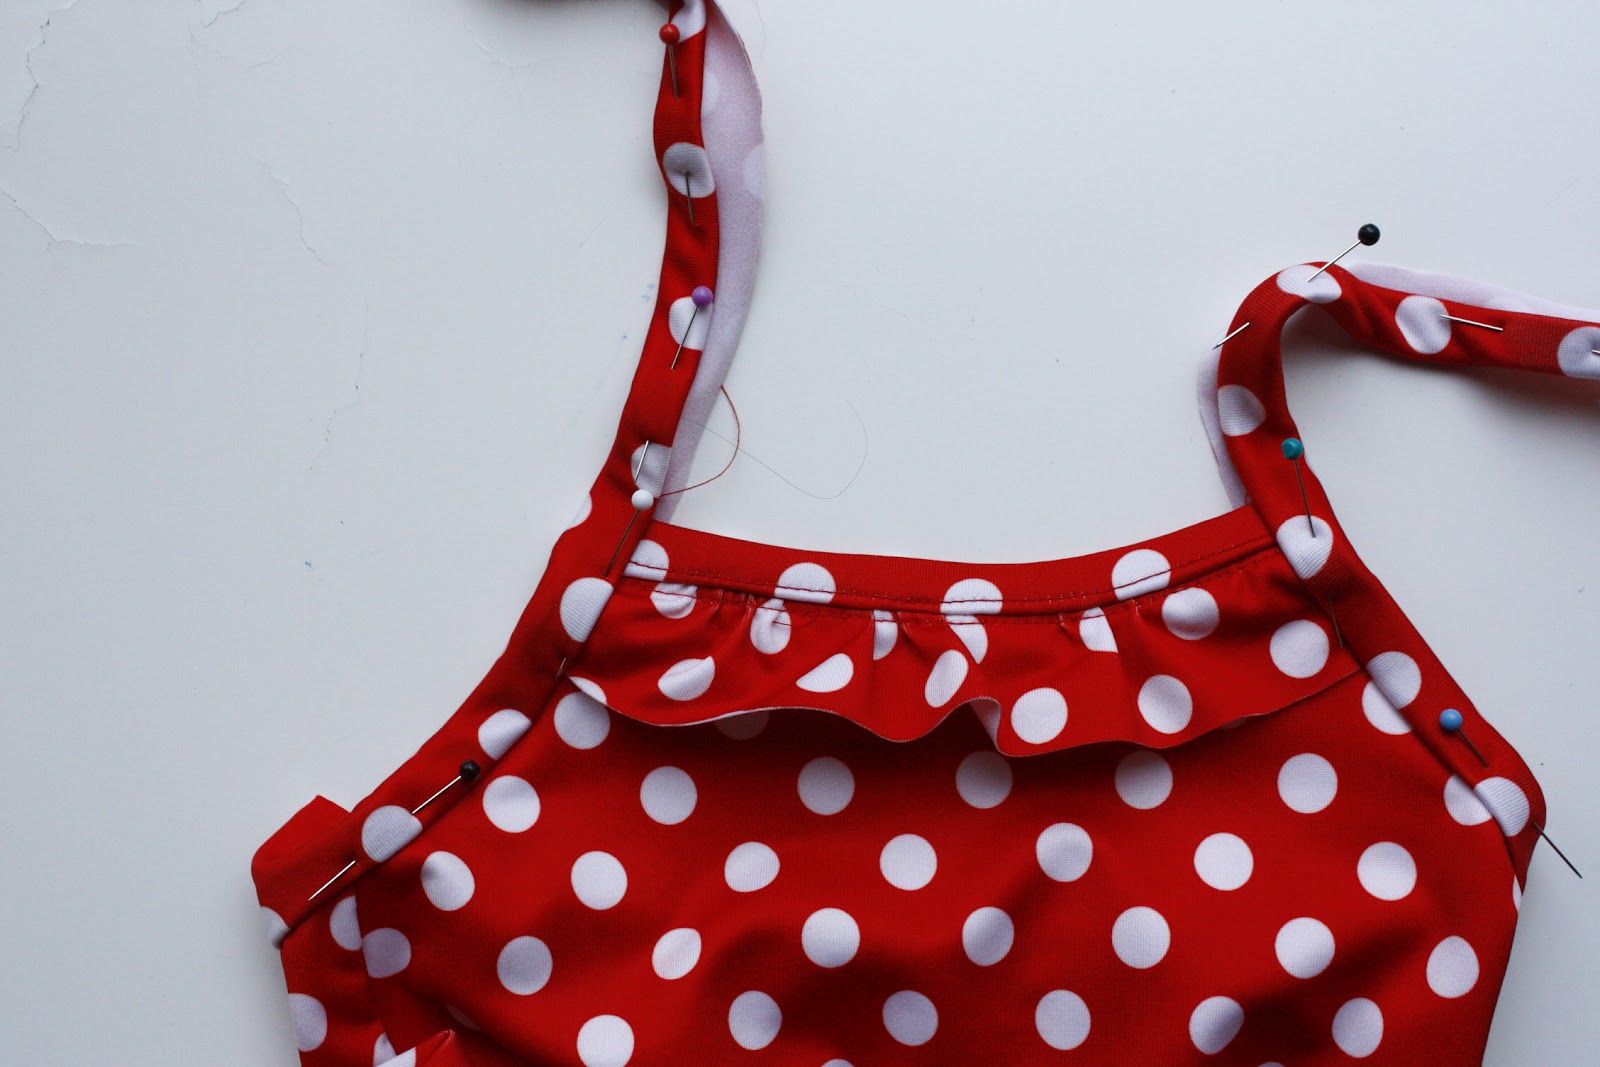
 I like to have the straps cross, that way they don't fall down. If you don't want them to cross, you'll have to cut them shorter.
Pin straps about 4 inches from each side seam.
I like to have the straps cross, that way they don't fall down. If you don't want them to cross, you'll have to cut them shorter.
Pin straps about 4 inches from each side seam.
Sew in place.
All done and ready for the pool!
Pat yourself on the back, you did it! Not so bad, right?
A perfect fit.
Pretty ruffles.
A bum that fits! Who could ask for more.
Definitely let me know what you think! I put a lot of work into this, and even still, I'm sure it's not perfect. So any and all feedback is great!
Oh, and if you're wondering about the pattern, I'll show some basic directions for tracing an existing bathing suit in a separate post. This one was getting a bit long!


 Wishing you a fun and Springy weekend (it's snowing where I am).